


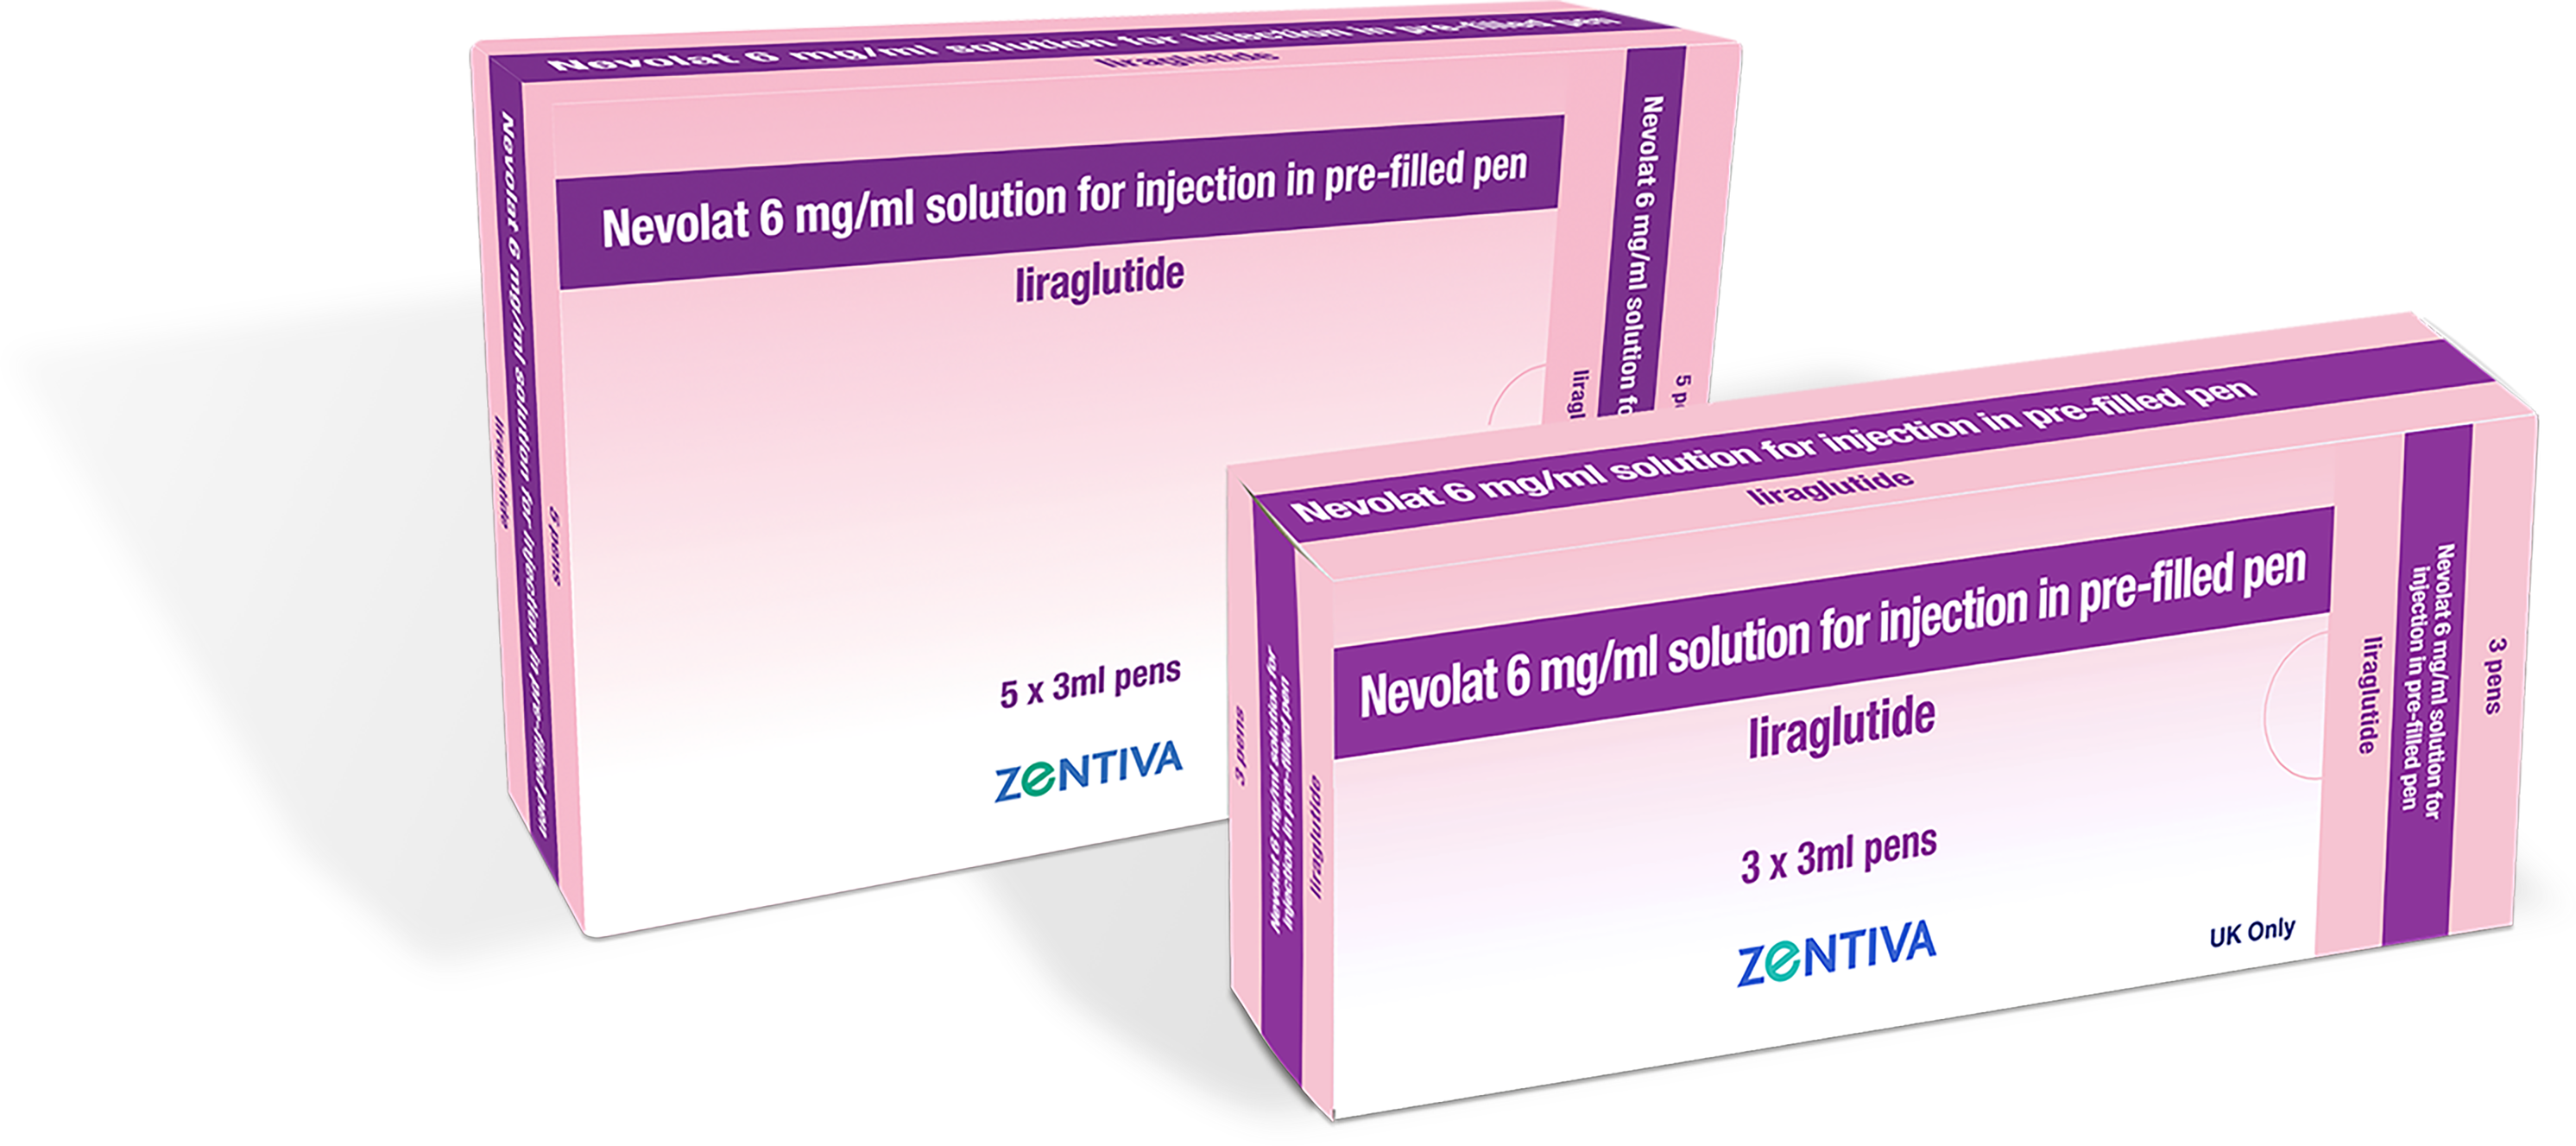
Method of administration
For instructions on how to use the Nevolat® pre-filled pen, your patients can watch the video or use the step-by-step guide below
For instructions on how to use the Nevolat® pre-filled pen, your patients can watch the video or use the step-by-step guide below
How to use the Nevolat® pen
Step-by-step guide on how to use the pre-filled pen
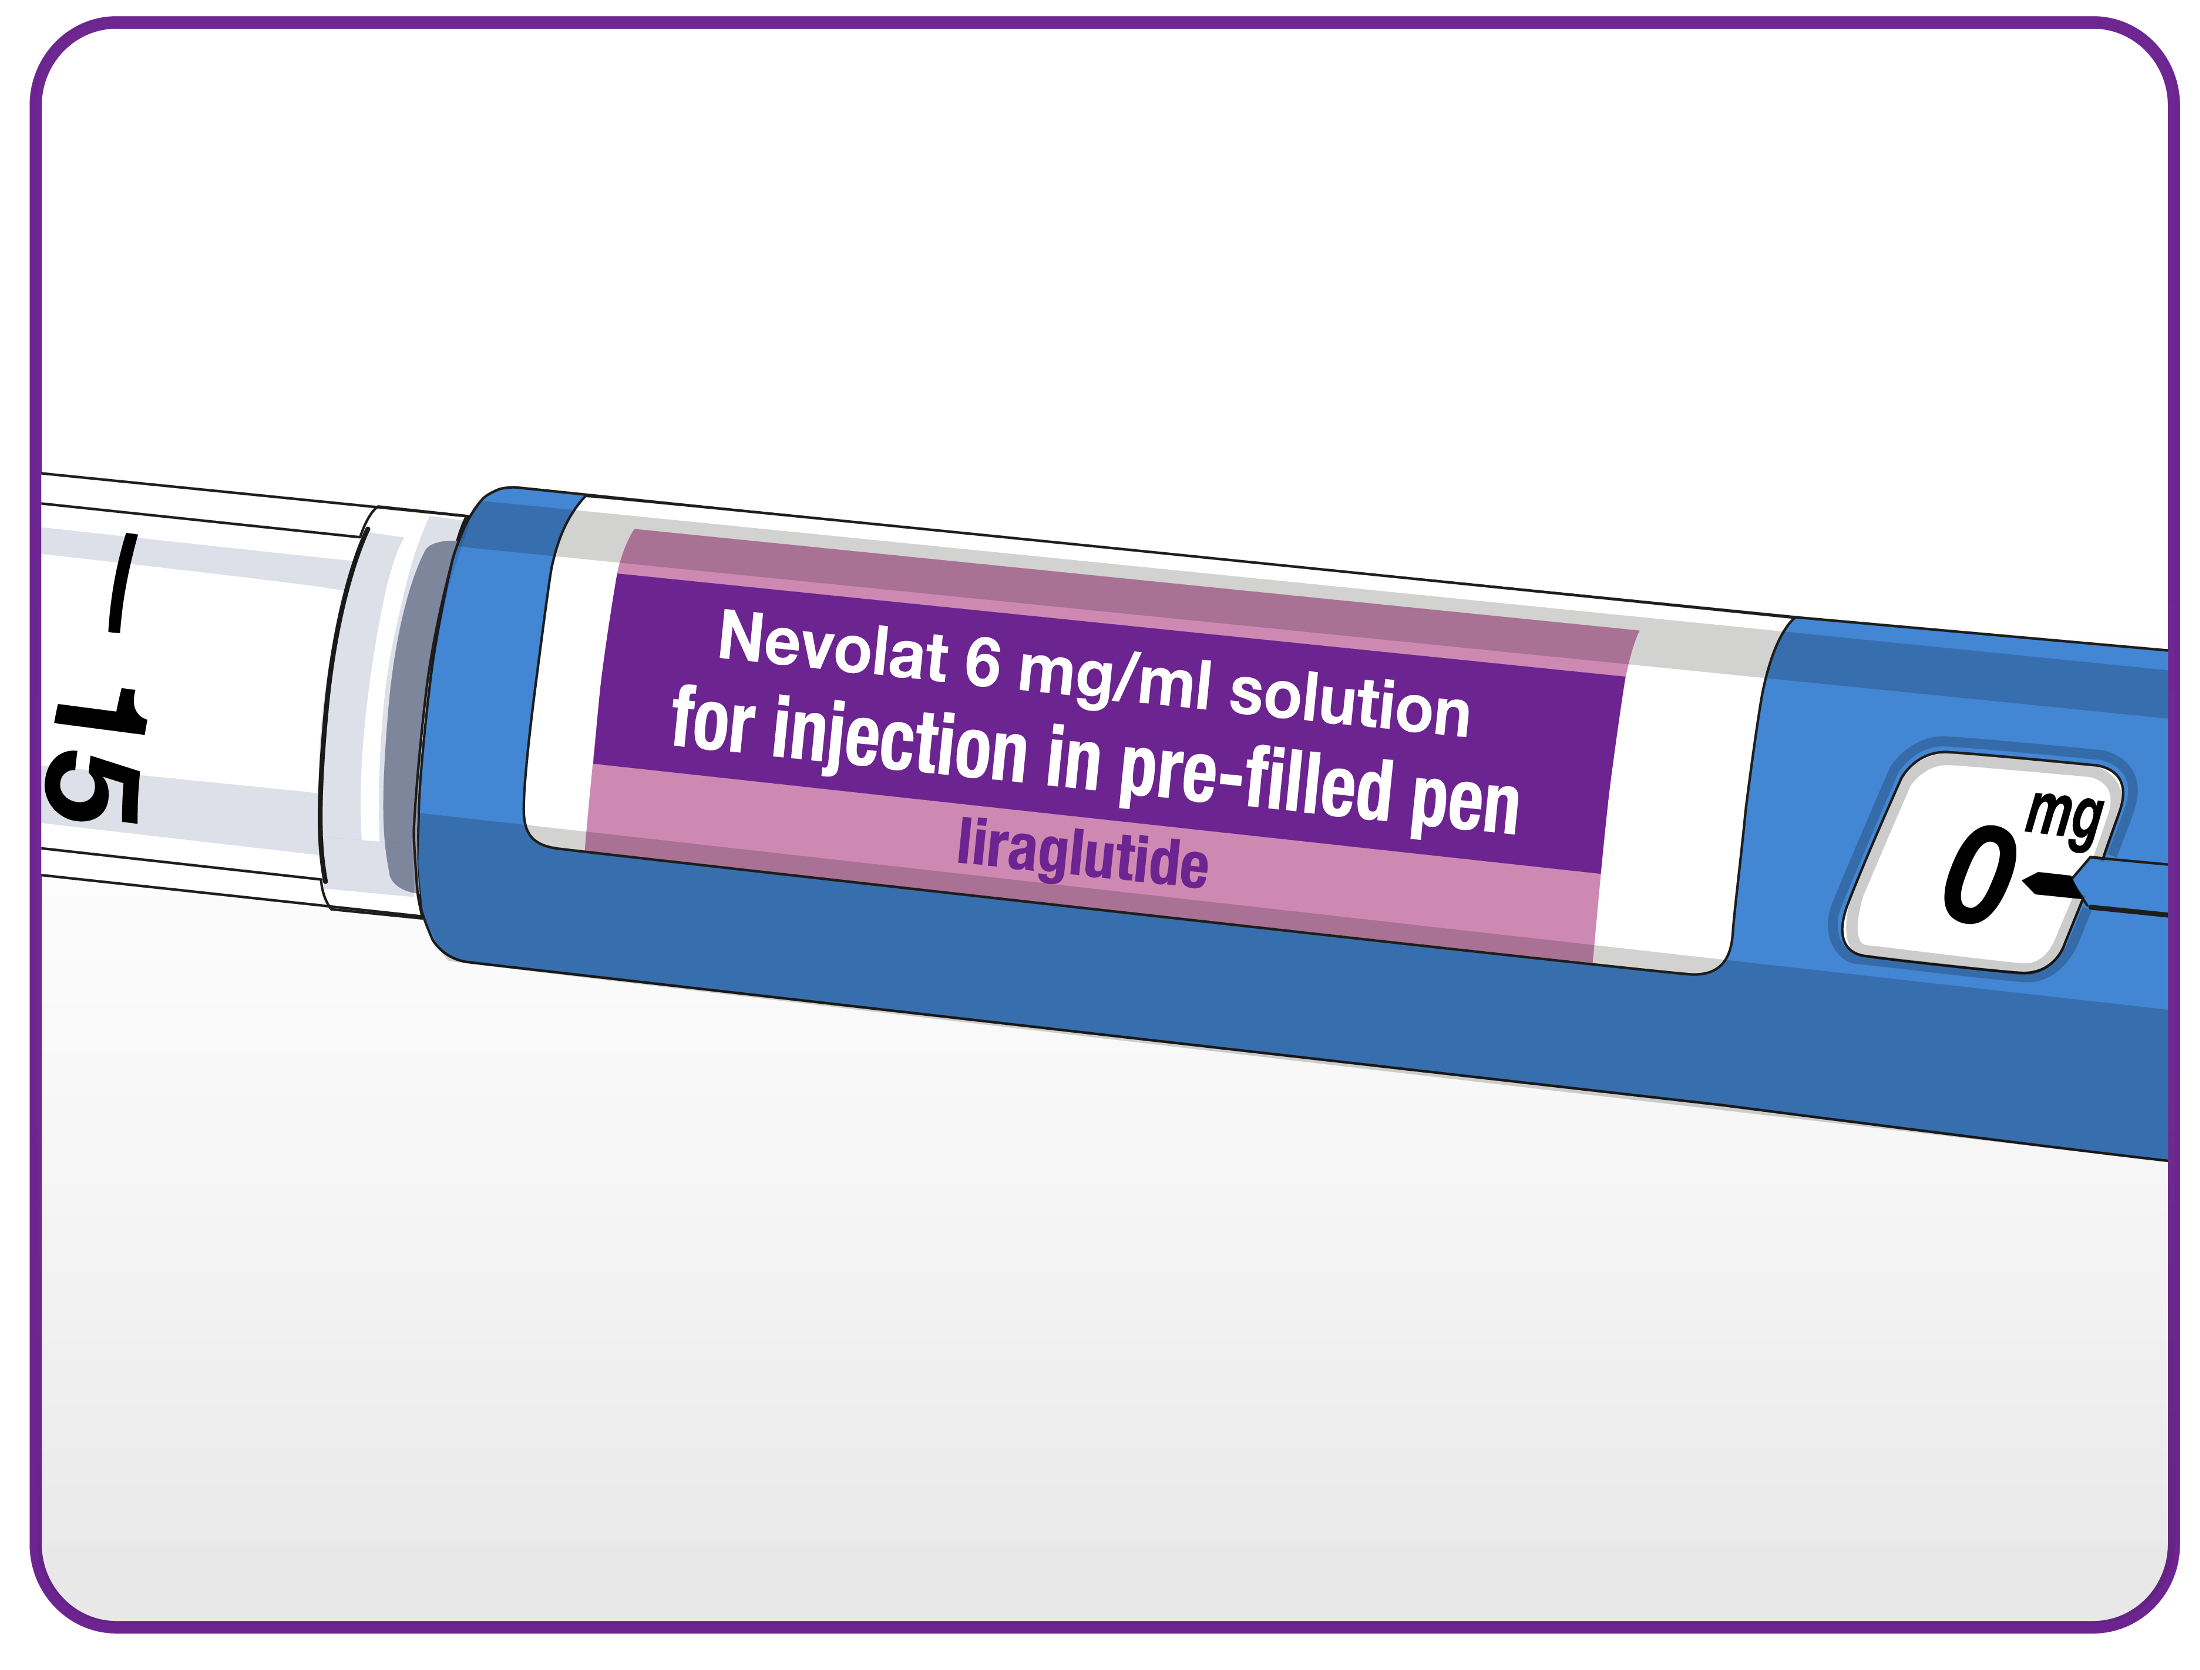
Patients should check the name and coloured label of the pen to ensure that it contains Nevolat. Using the wrong medicine could cause them severe harm. Once checked, they can pull off the pen cap.
Patients should check that the solution in the pen is clear by looking through the pen window. If the solution looks cloudy, they should not use the pen.
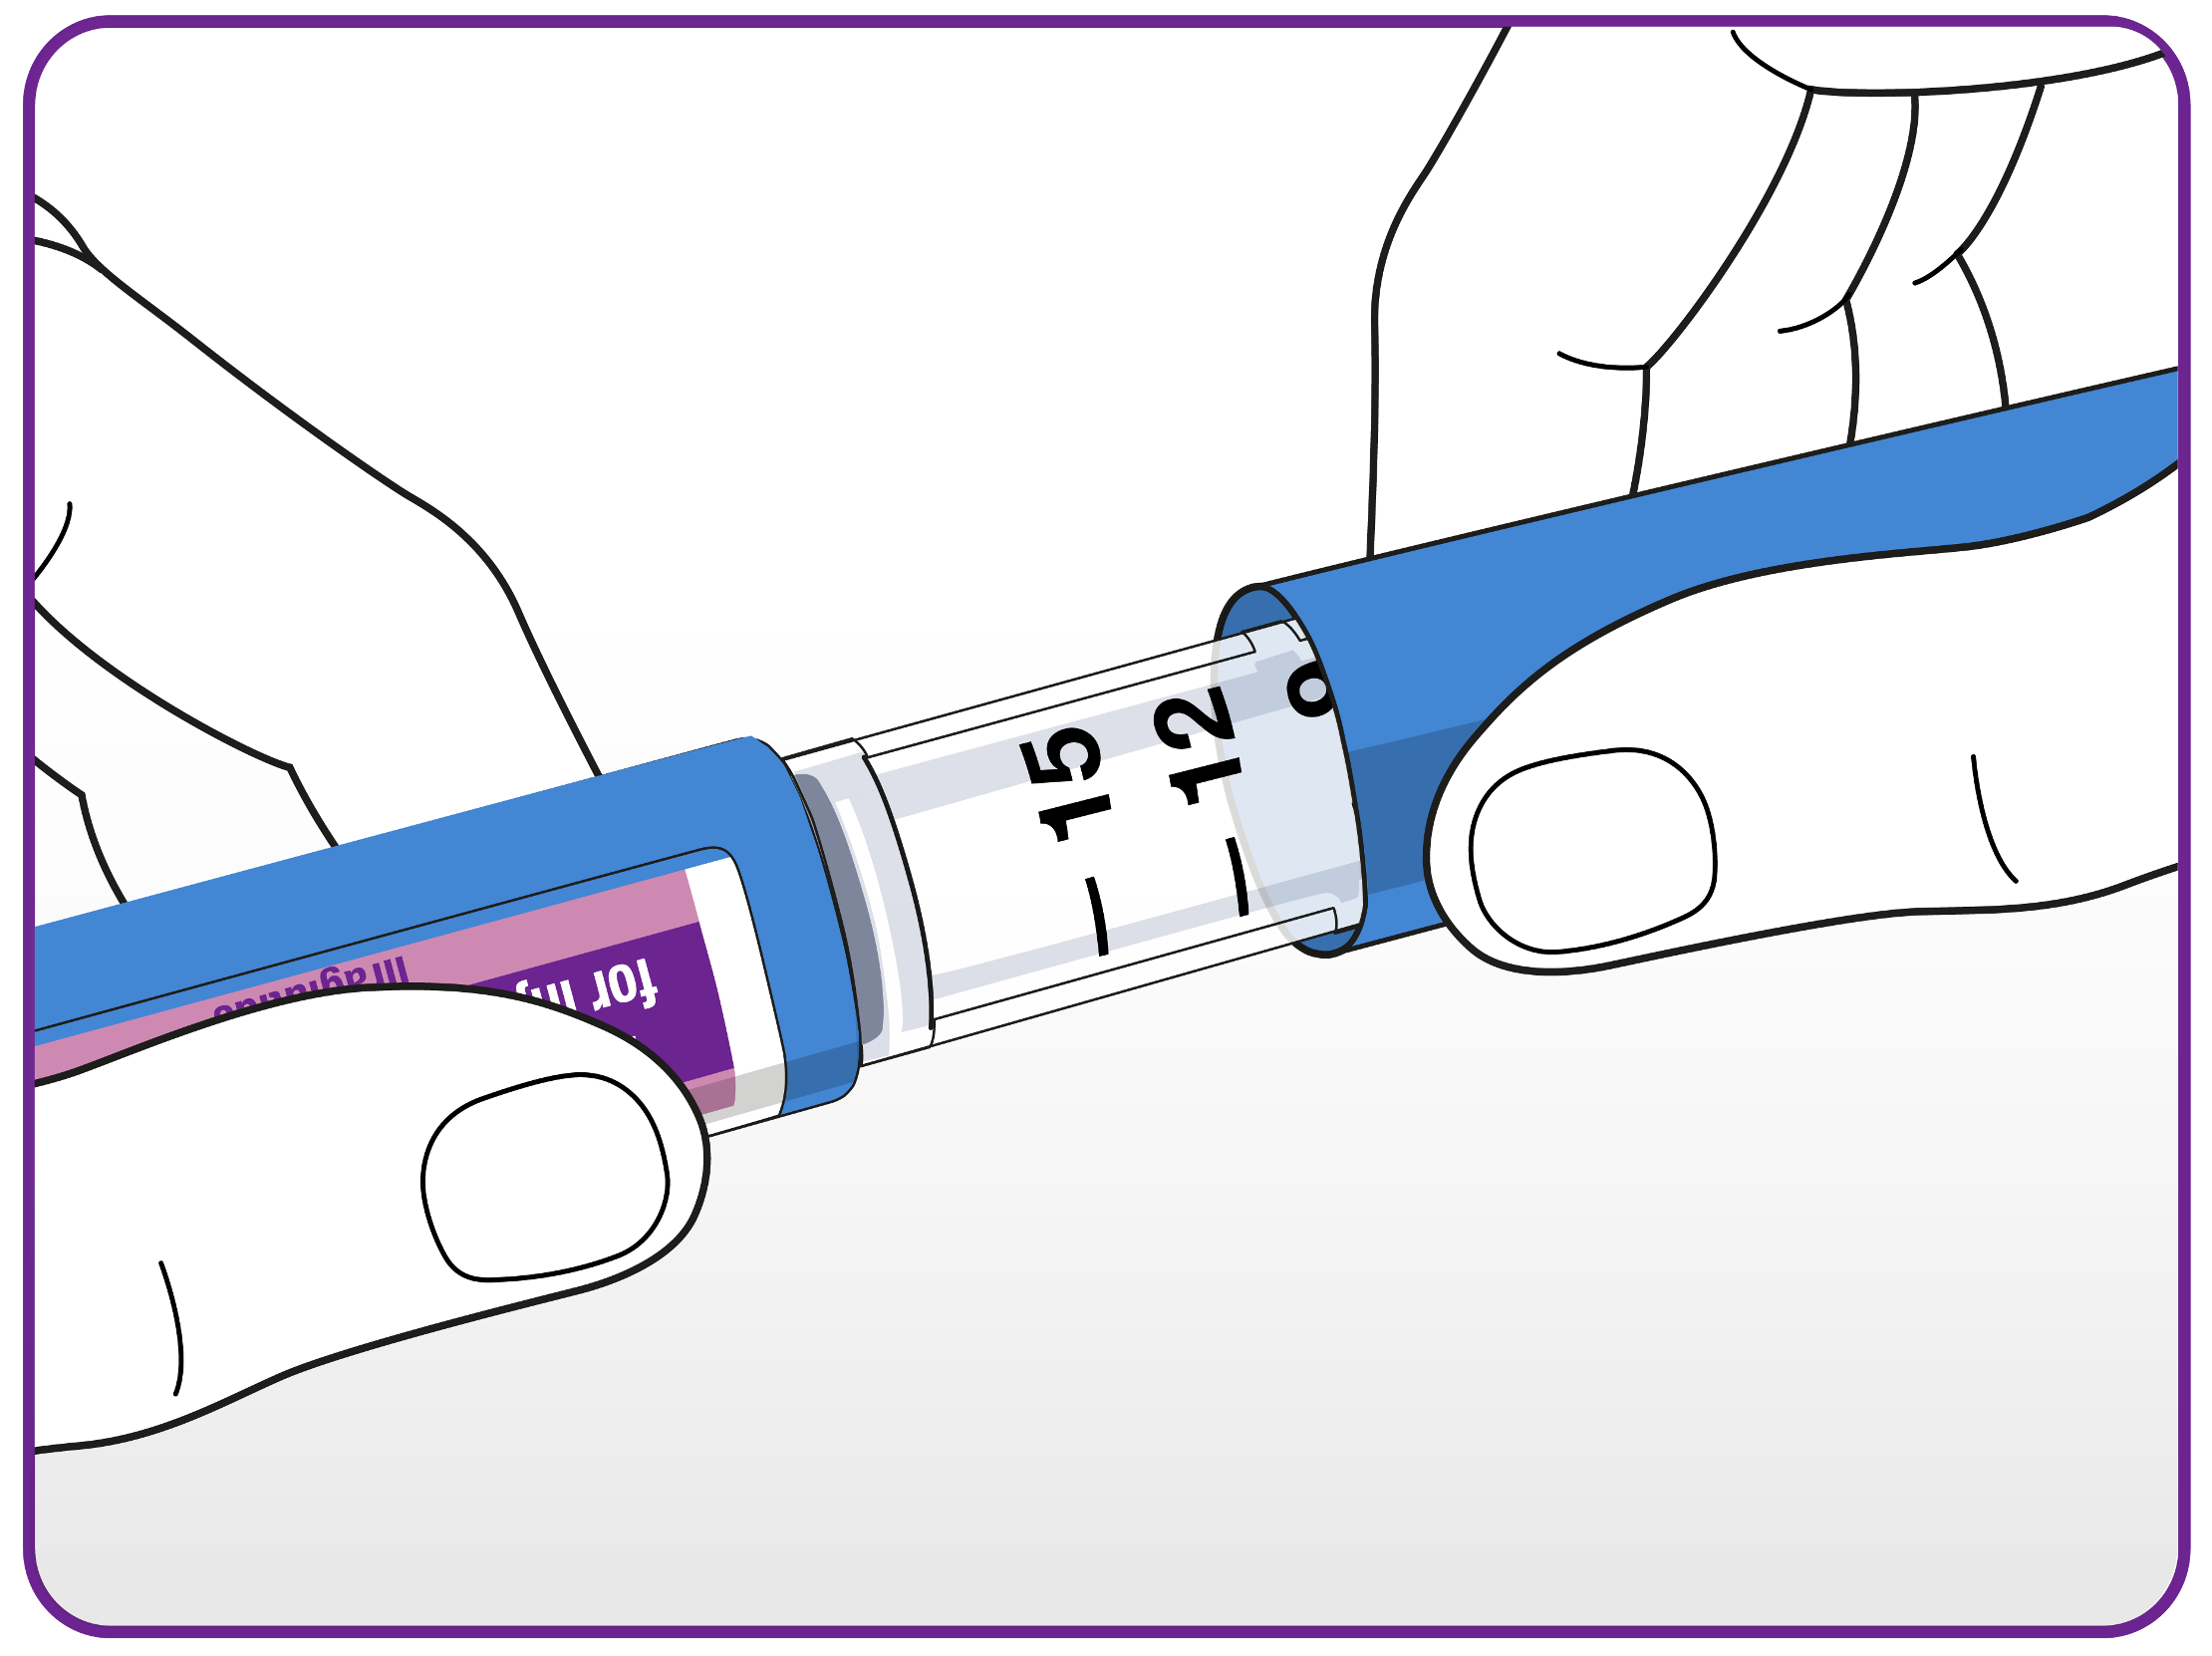
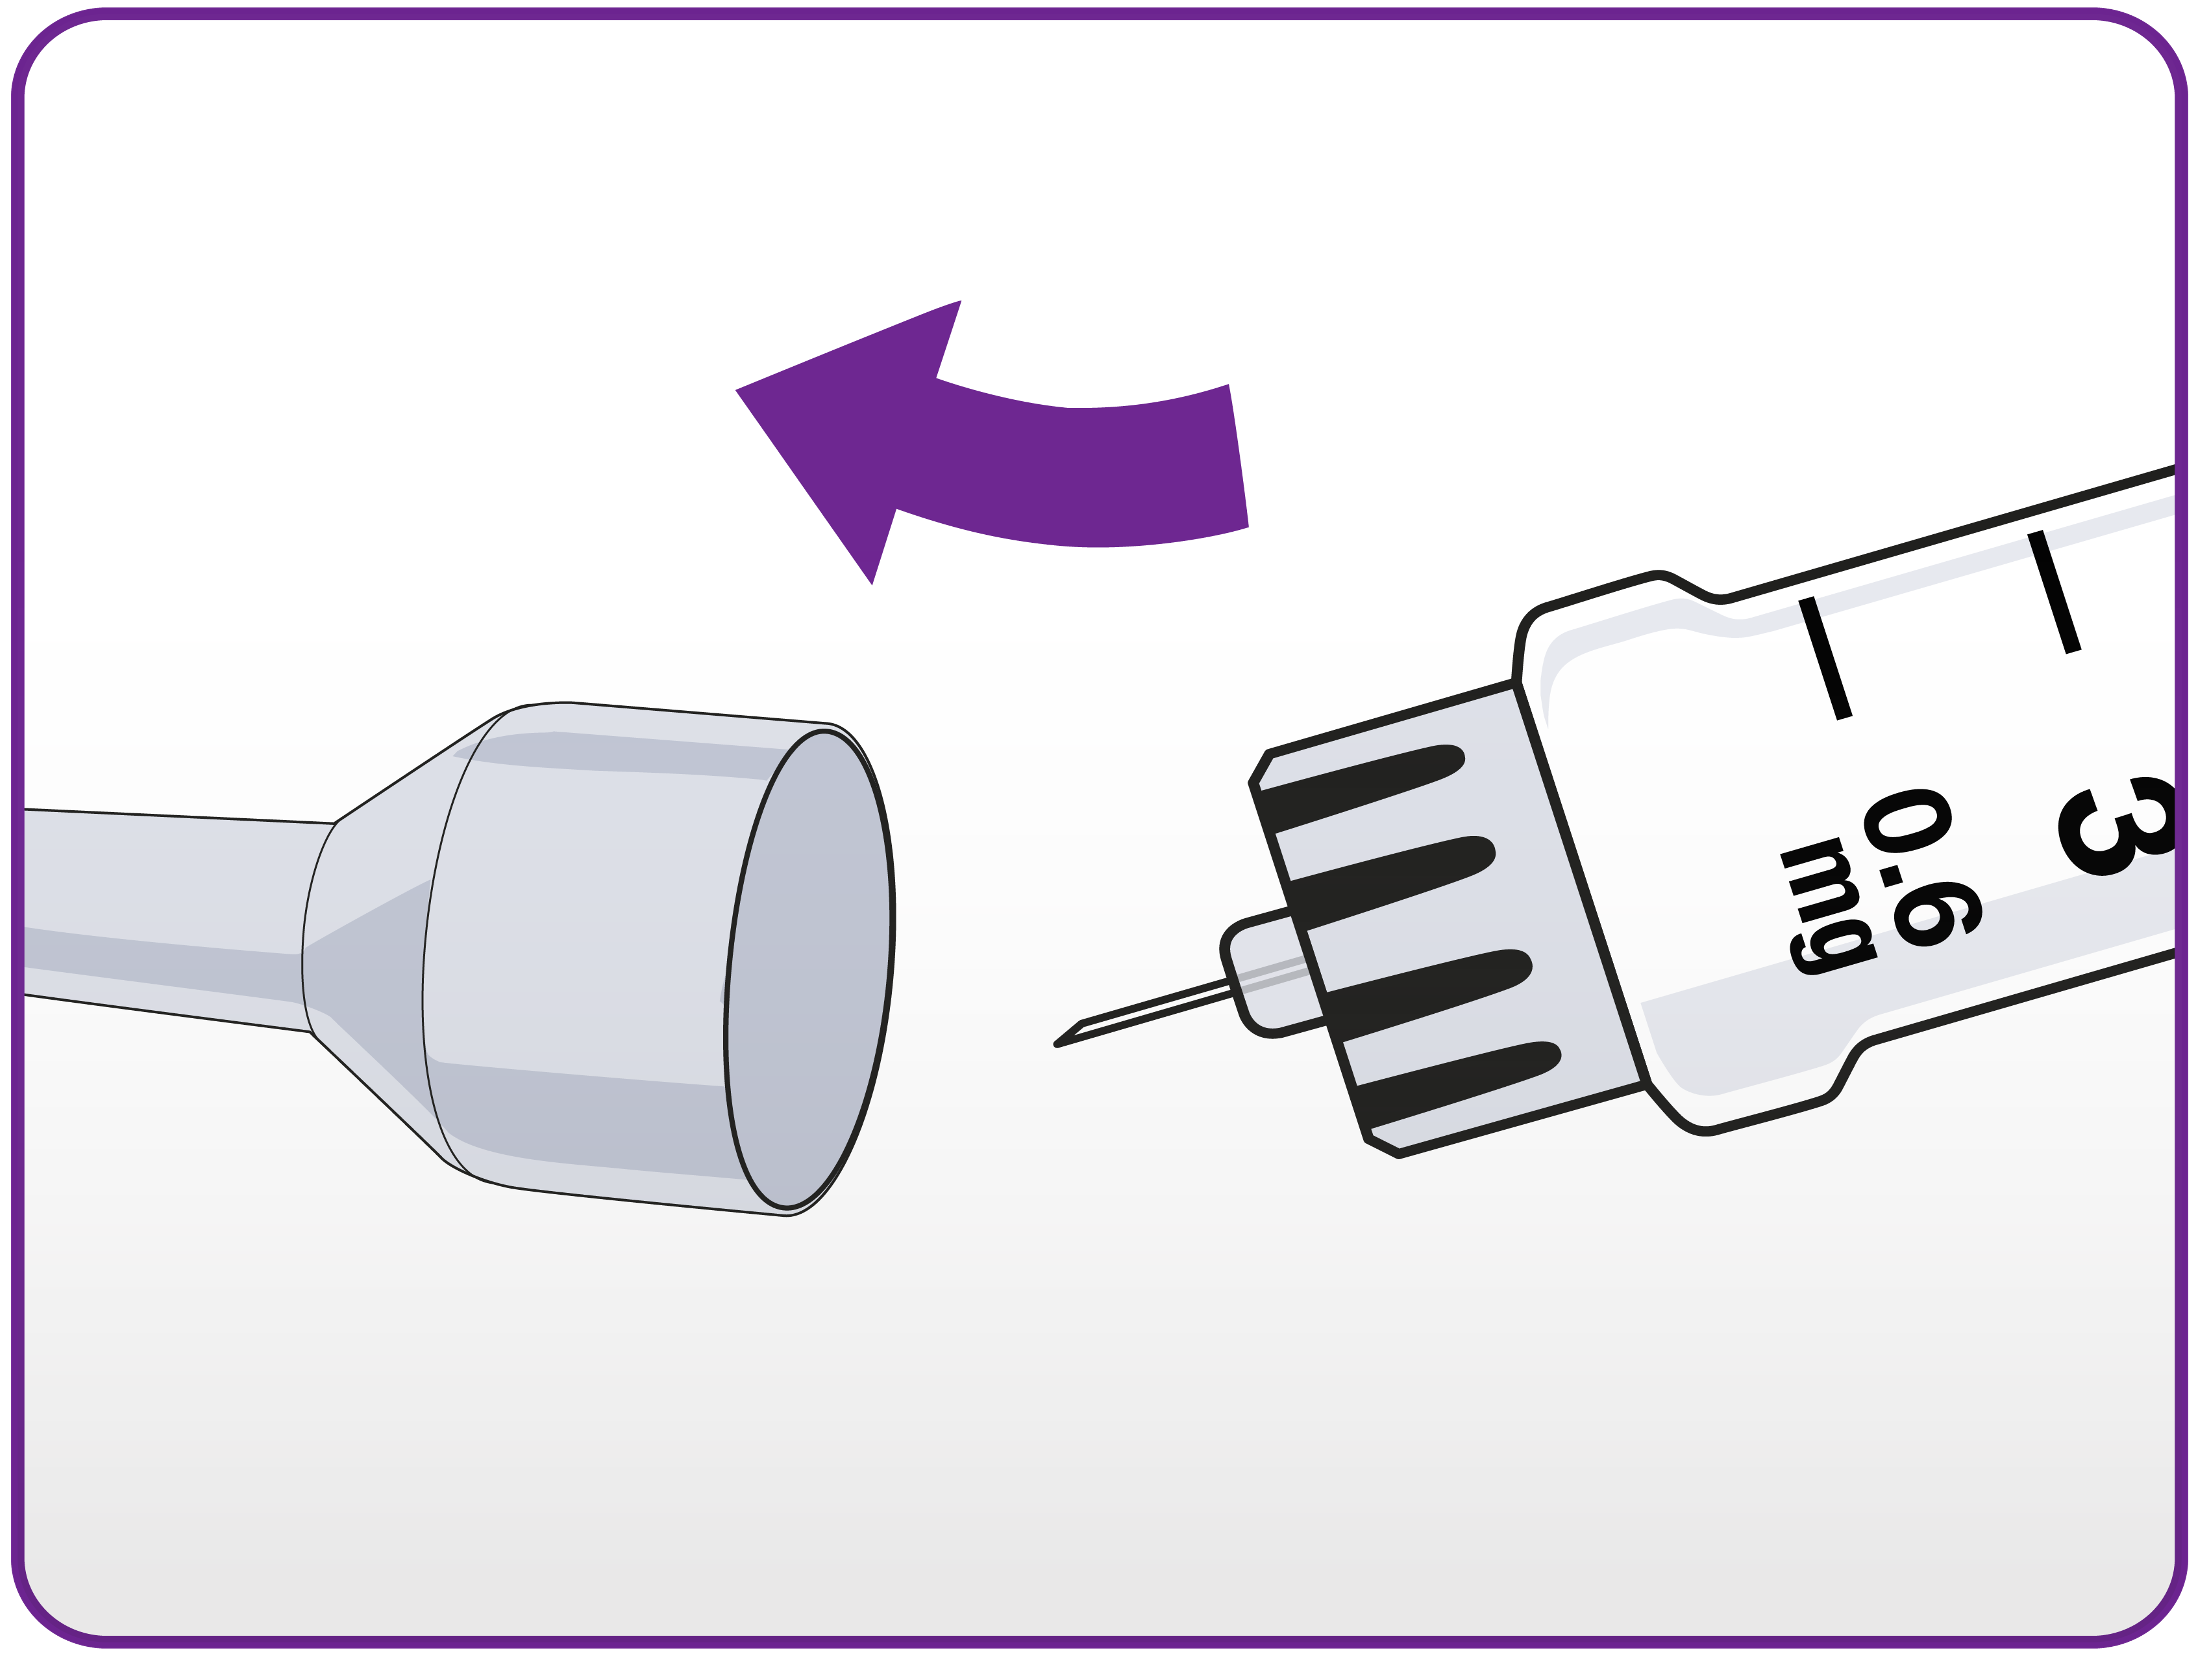
Advise patients to take new needle and remove the paper tab.
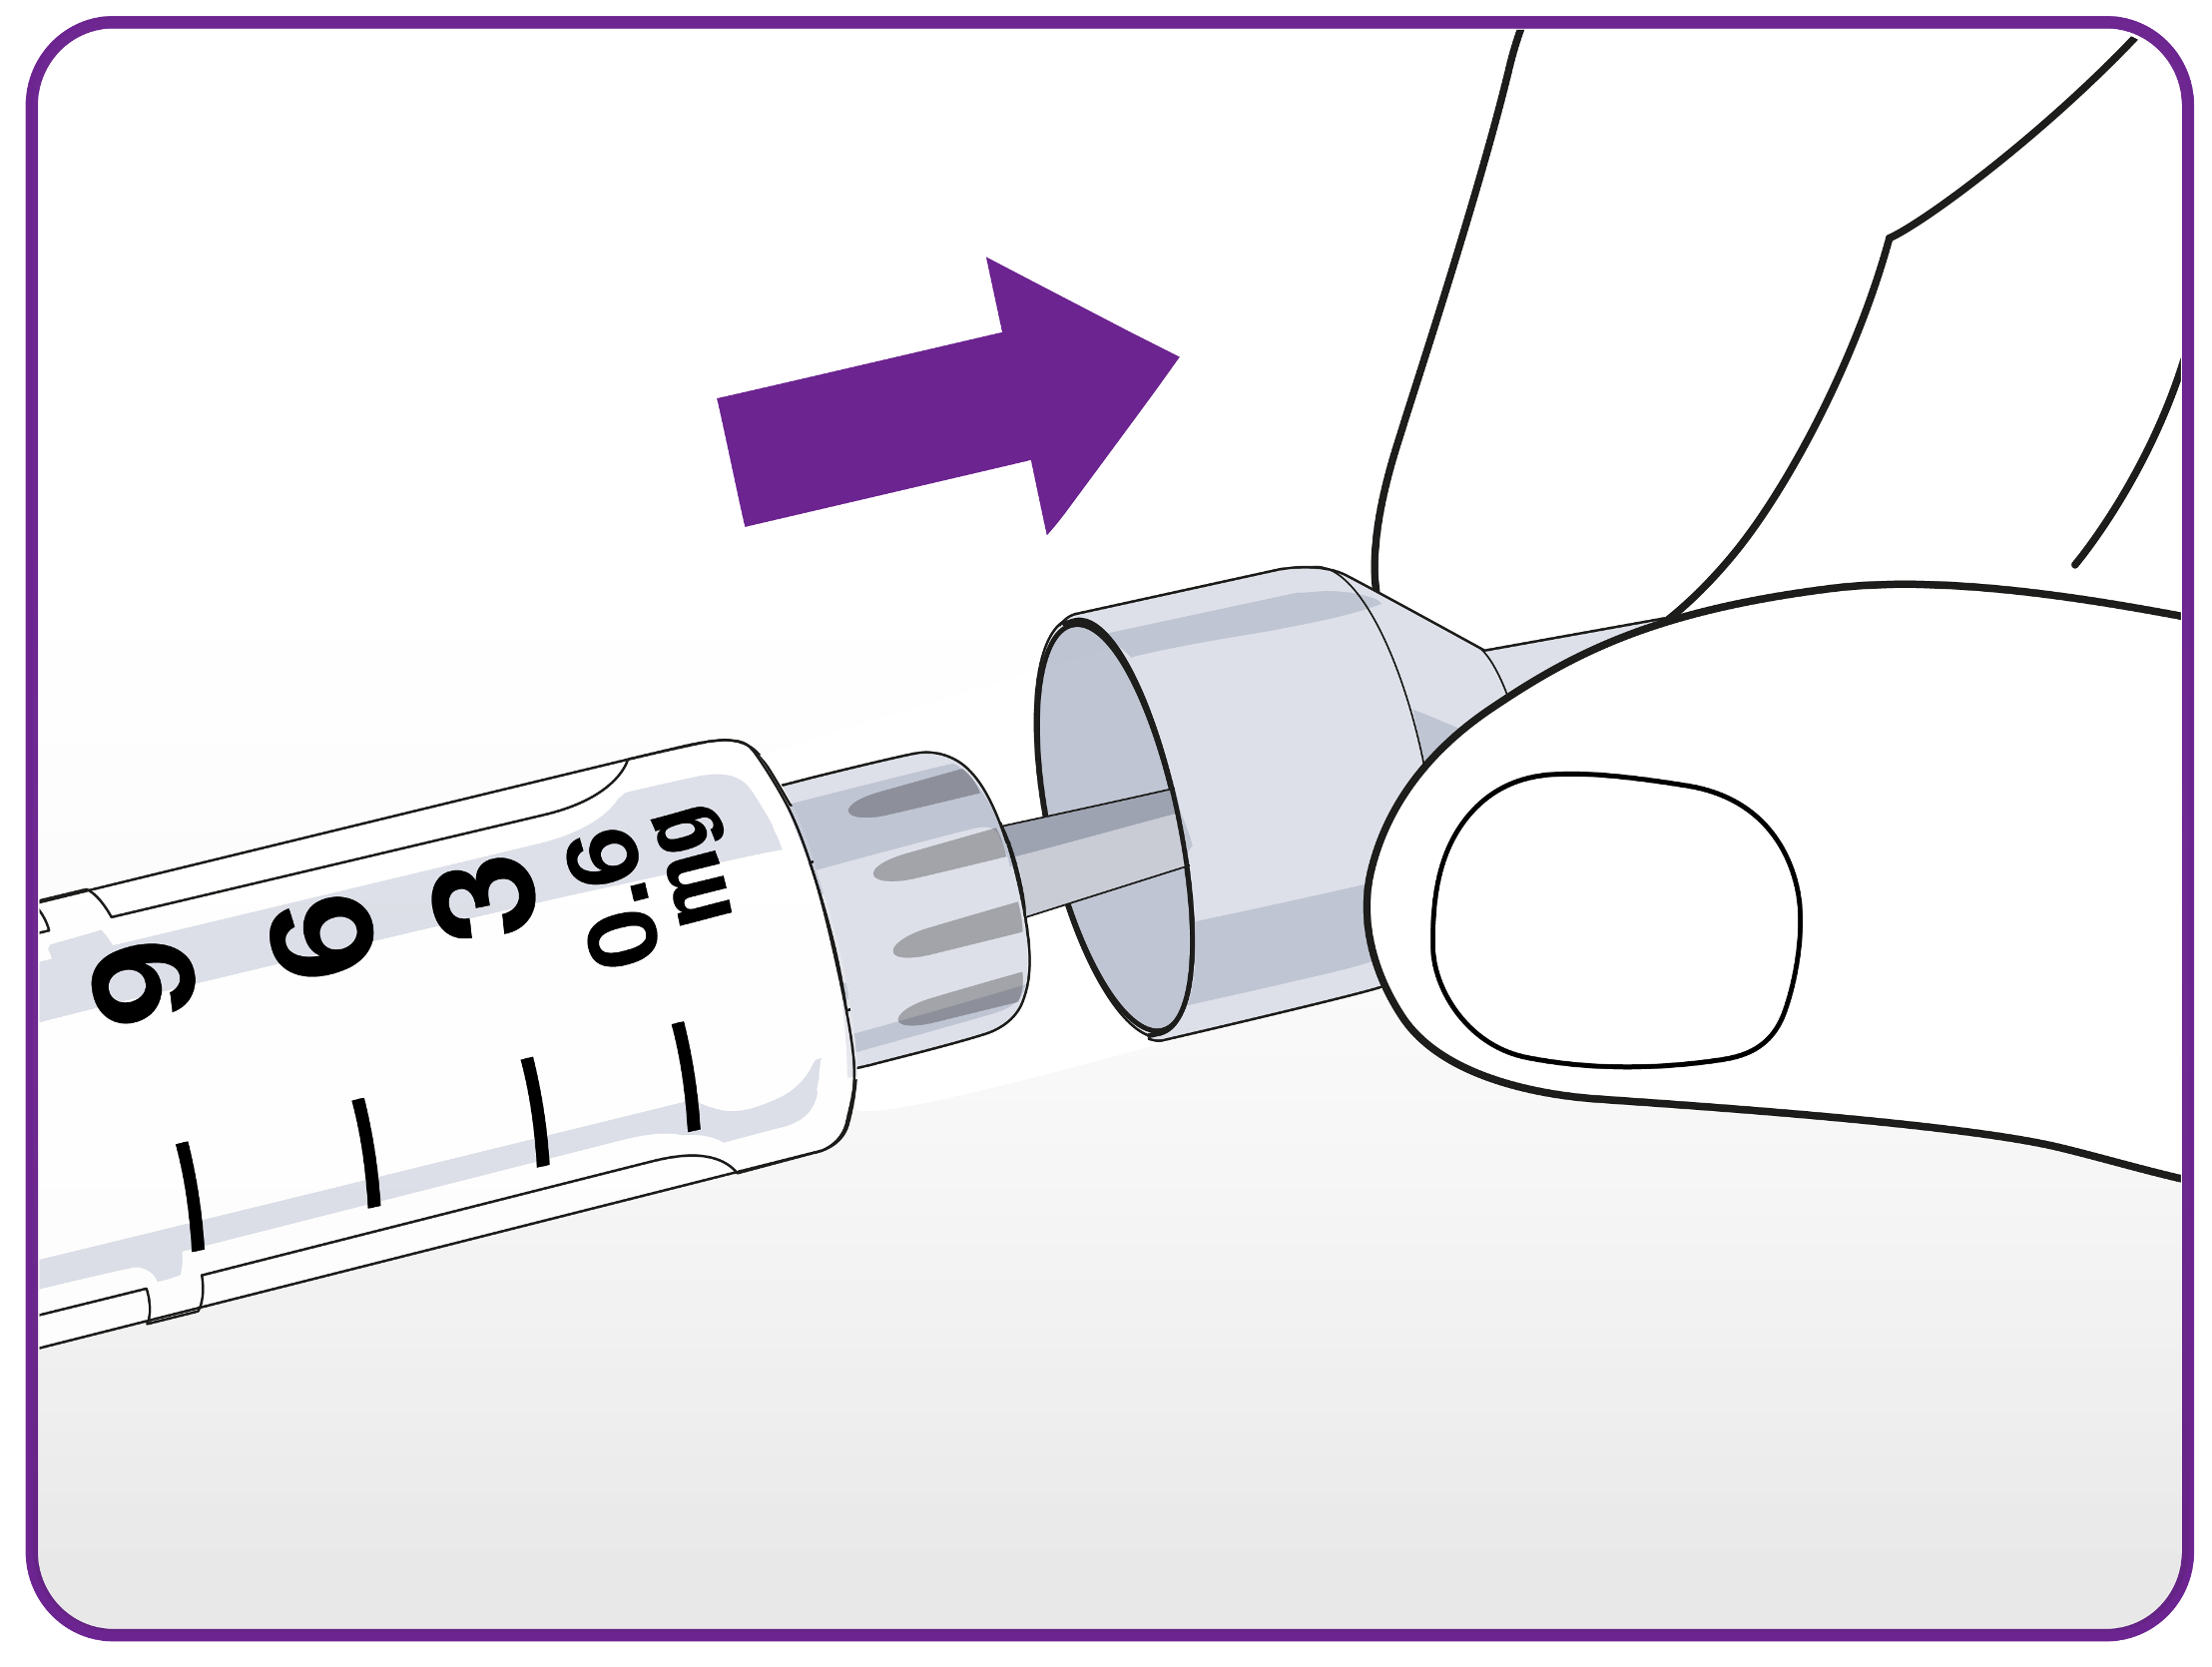
Patients should attach the needle correctly by pushing the needle straight onto the pen and turning until it is tight.
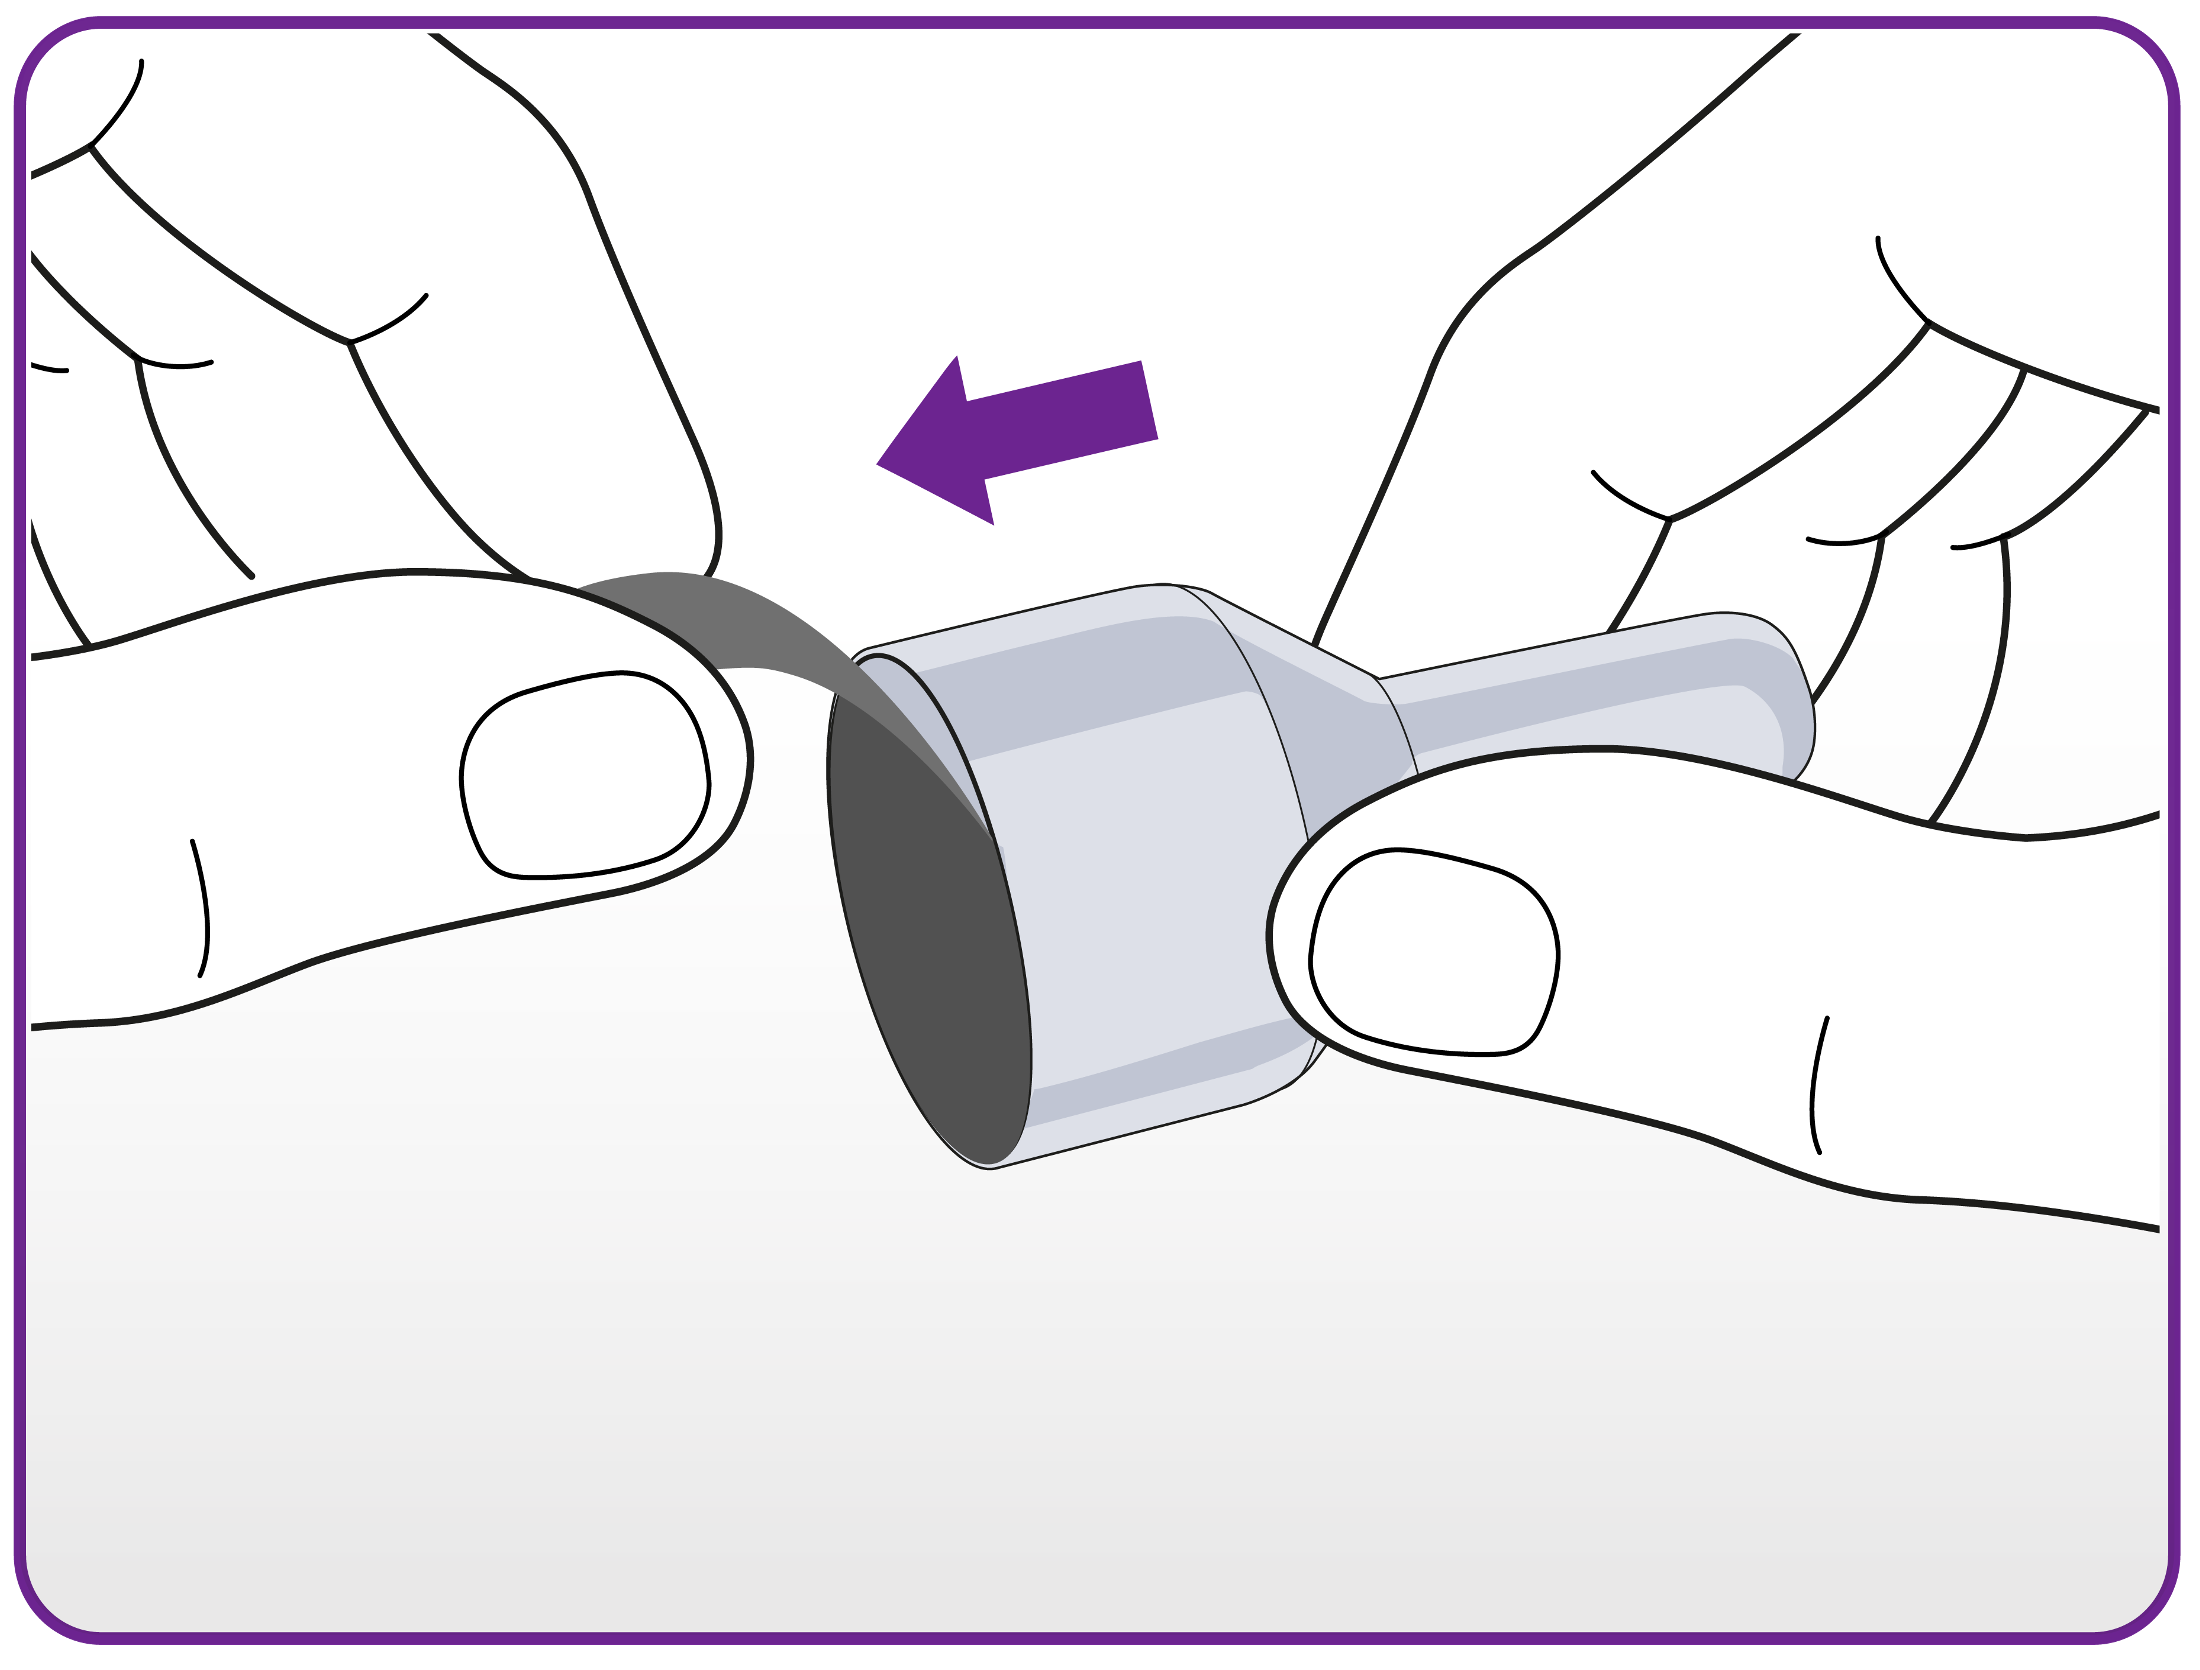
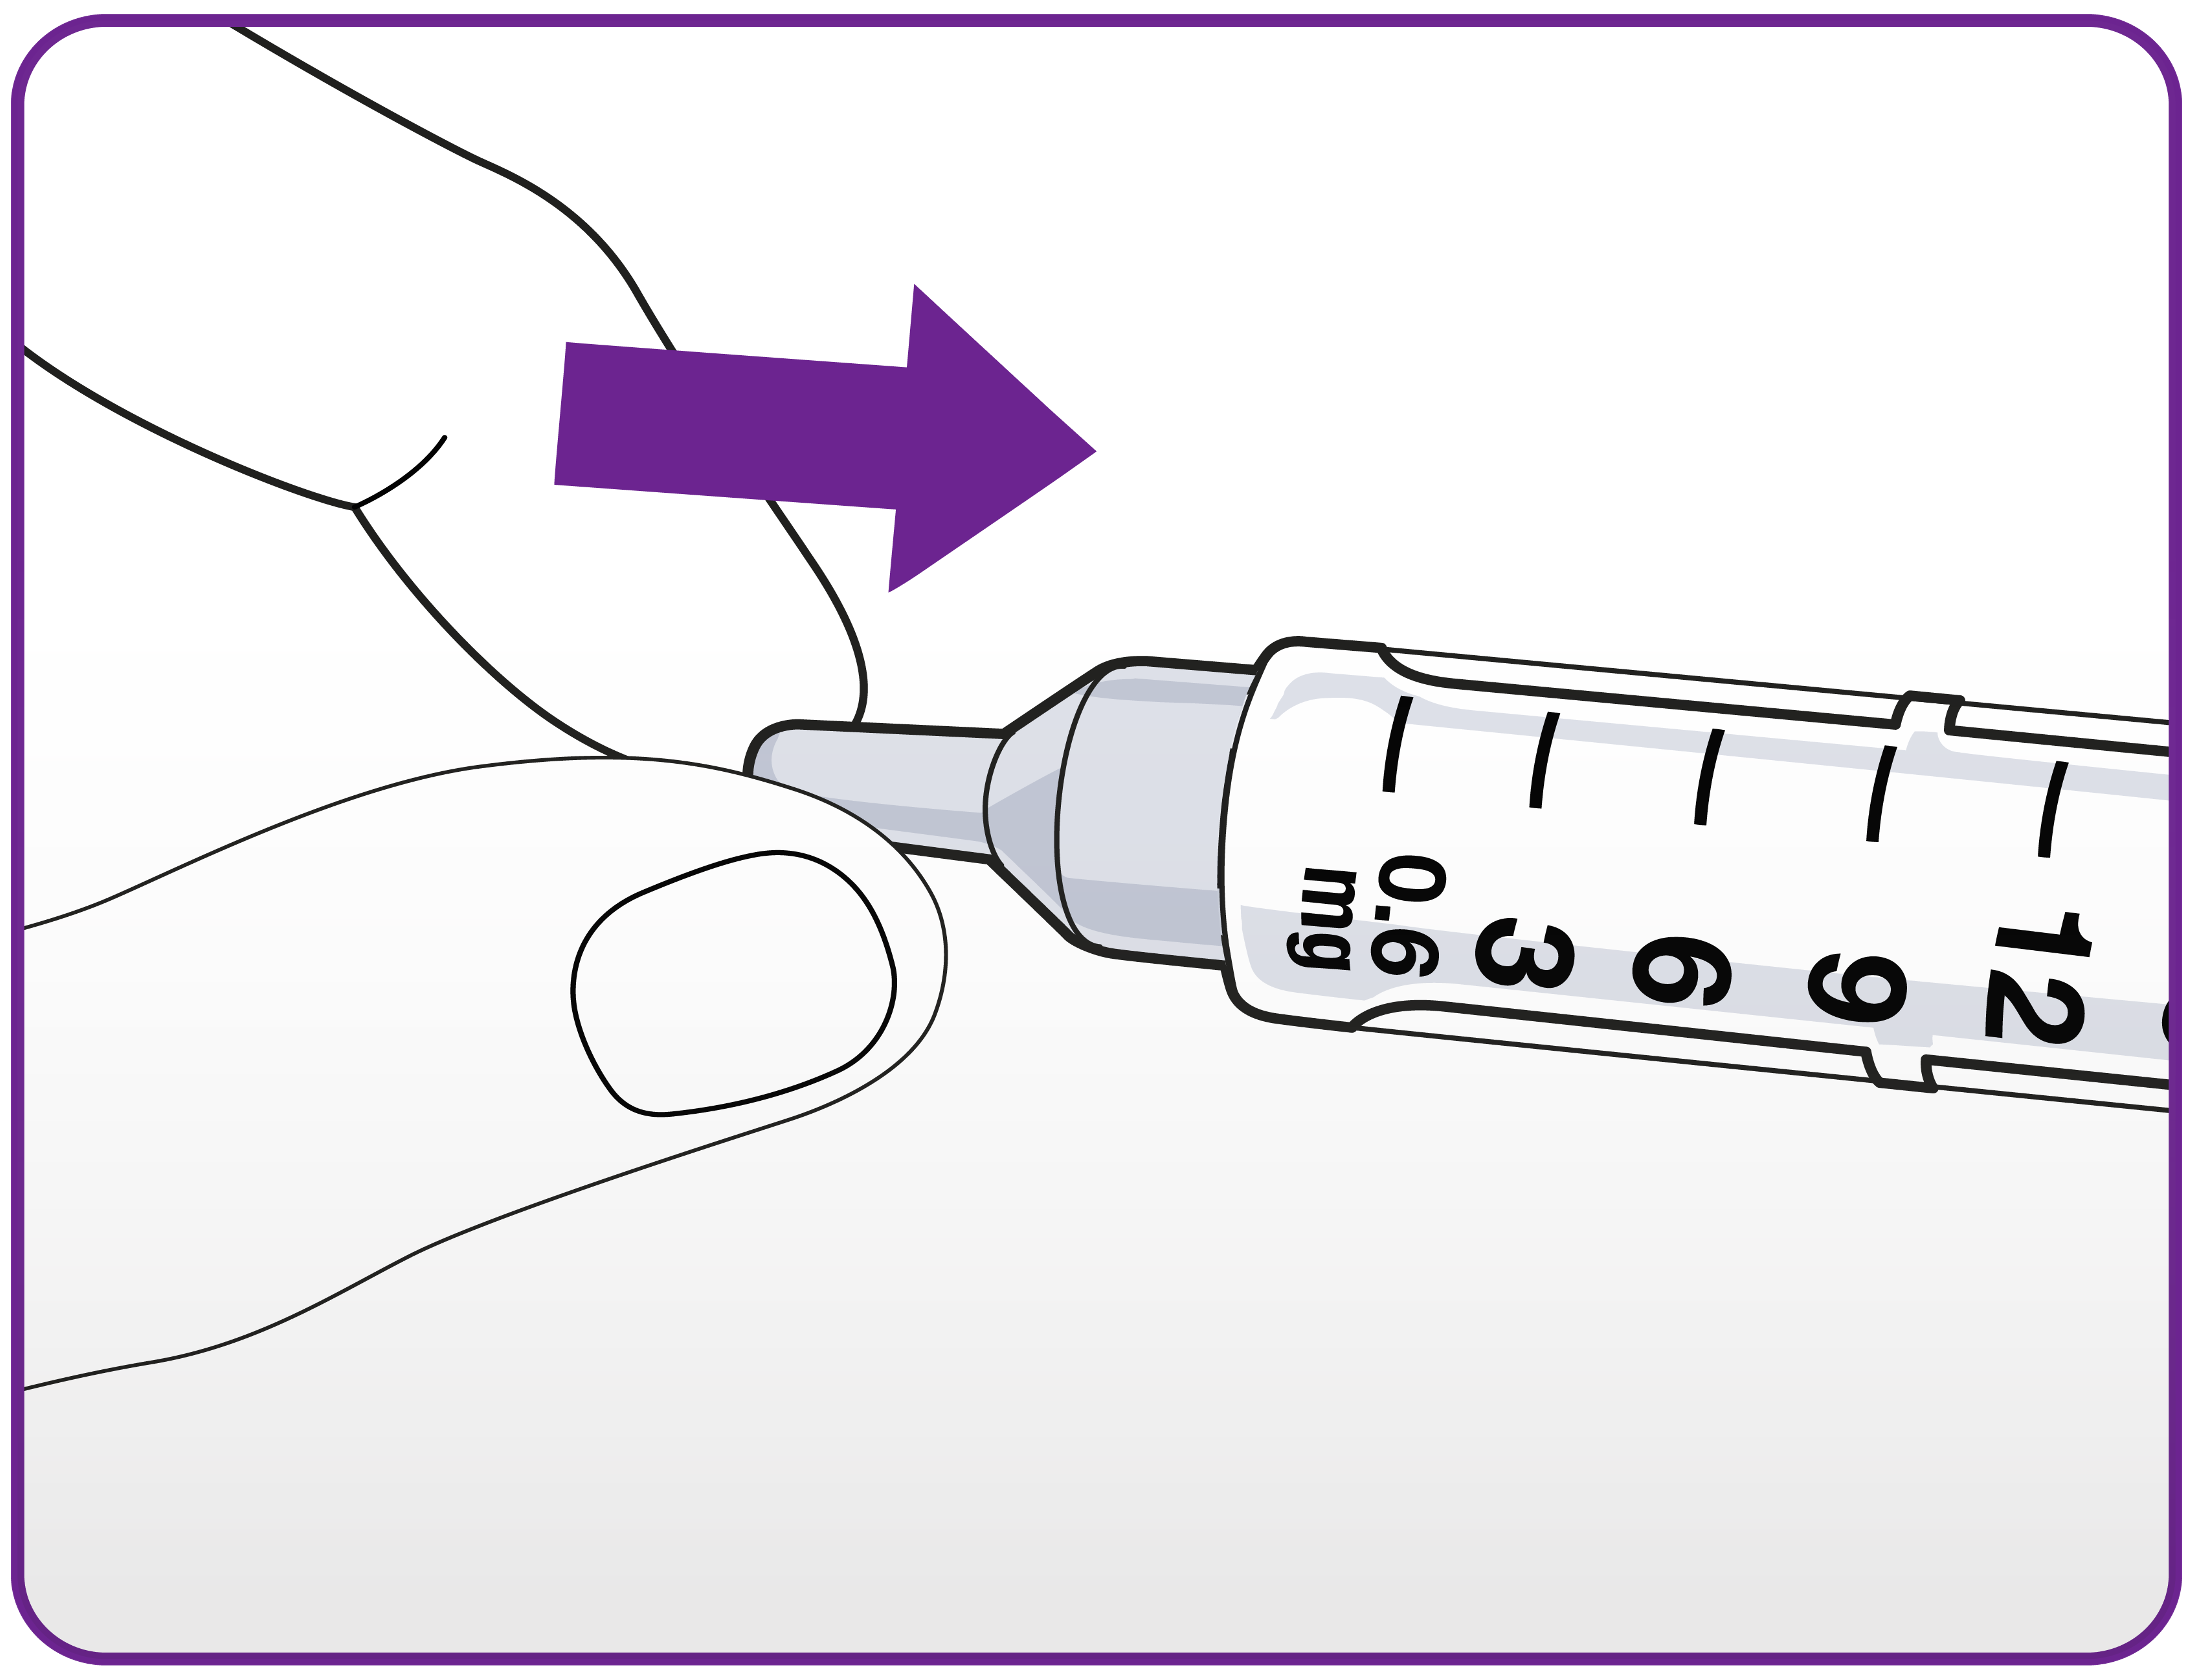
They should remove the outer needle cap and keep it for later (as they will need it after the injection, to safely remove the needle from the pen).
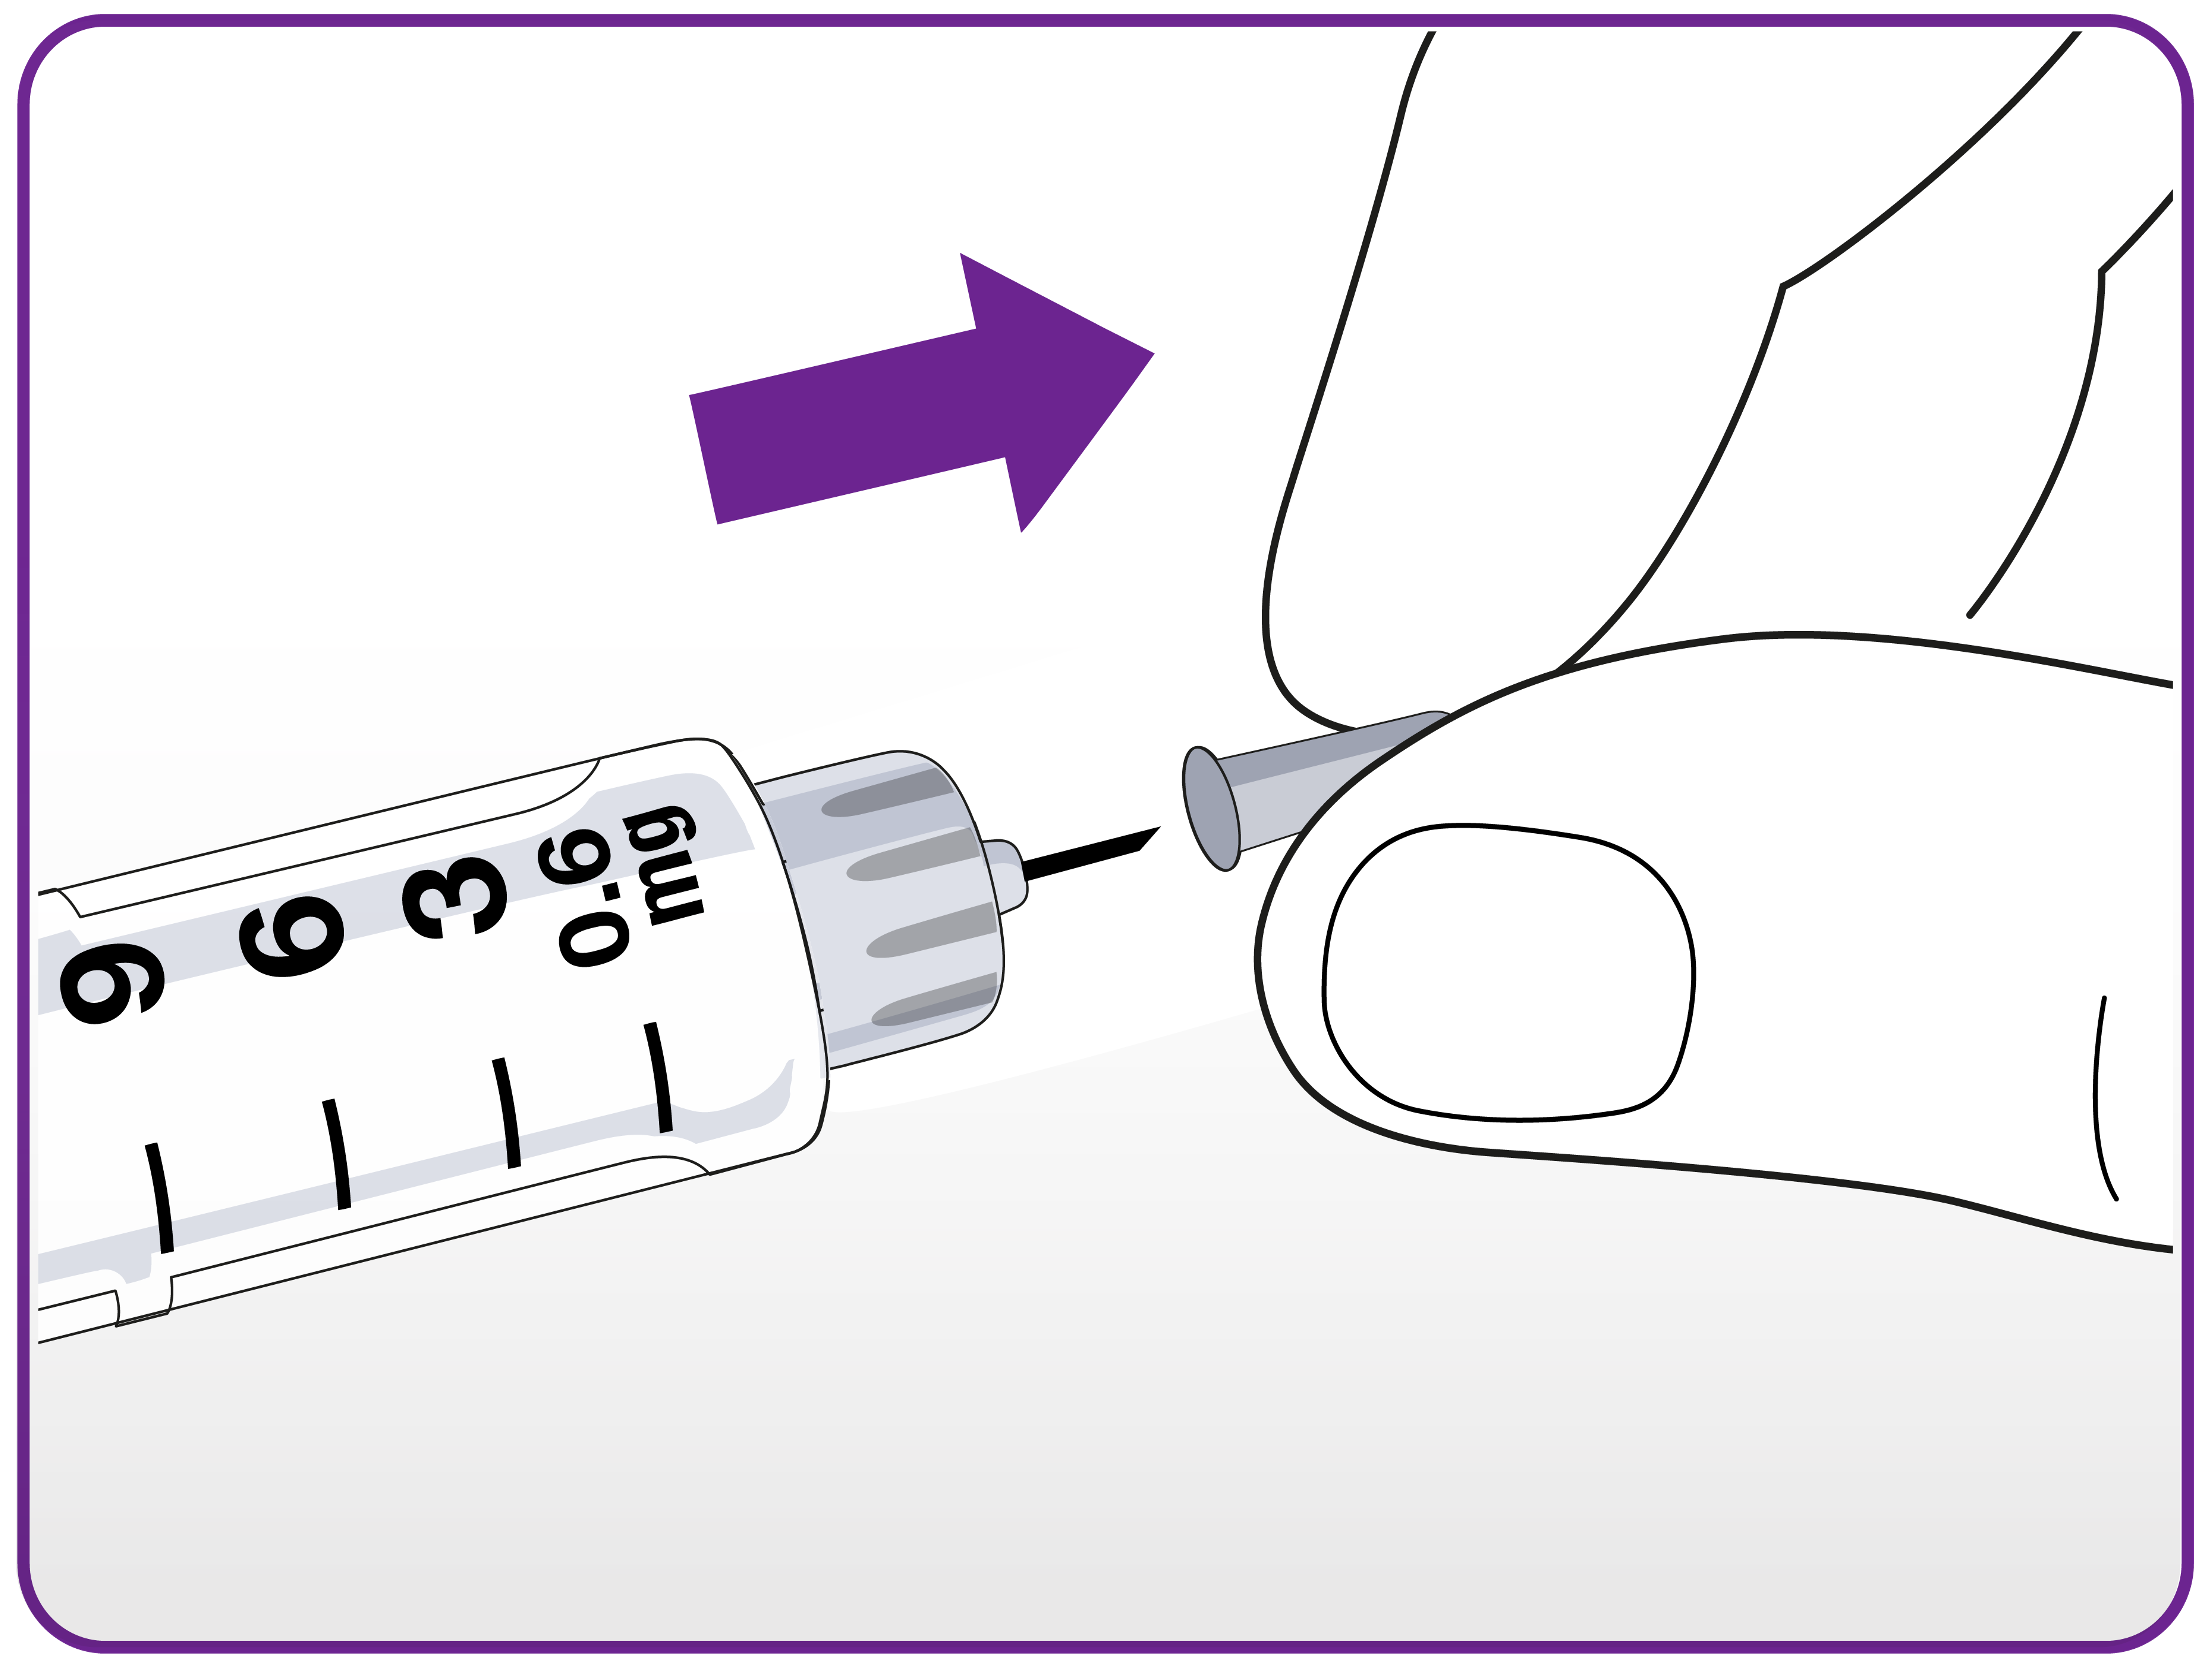
Patients can then pull off the inner needle cap and throw it away. Patients should not attach a new needle to the pen until they are ready to have their injection. Patients should always use a new needle for each injection.
Advise patients to check the flow with each new needle before injecting.
A new needle should be used with every injection to help prevent infections and blocked needles.
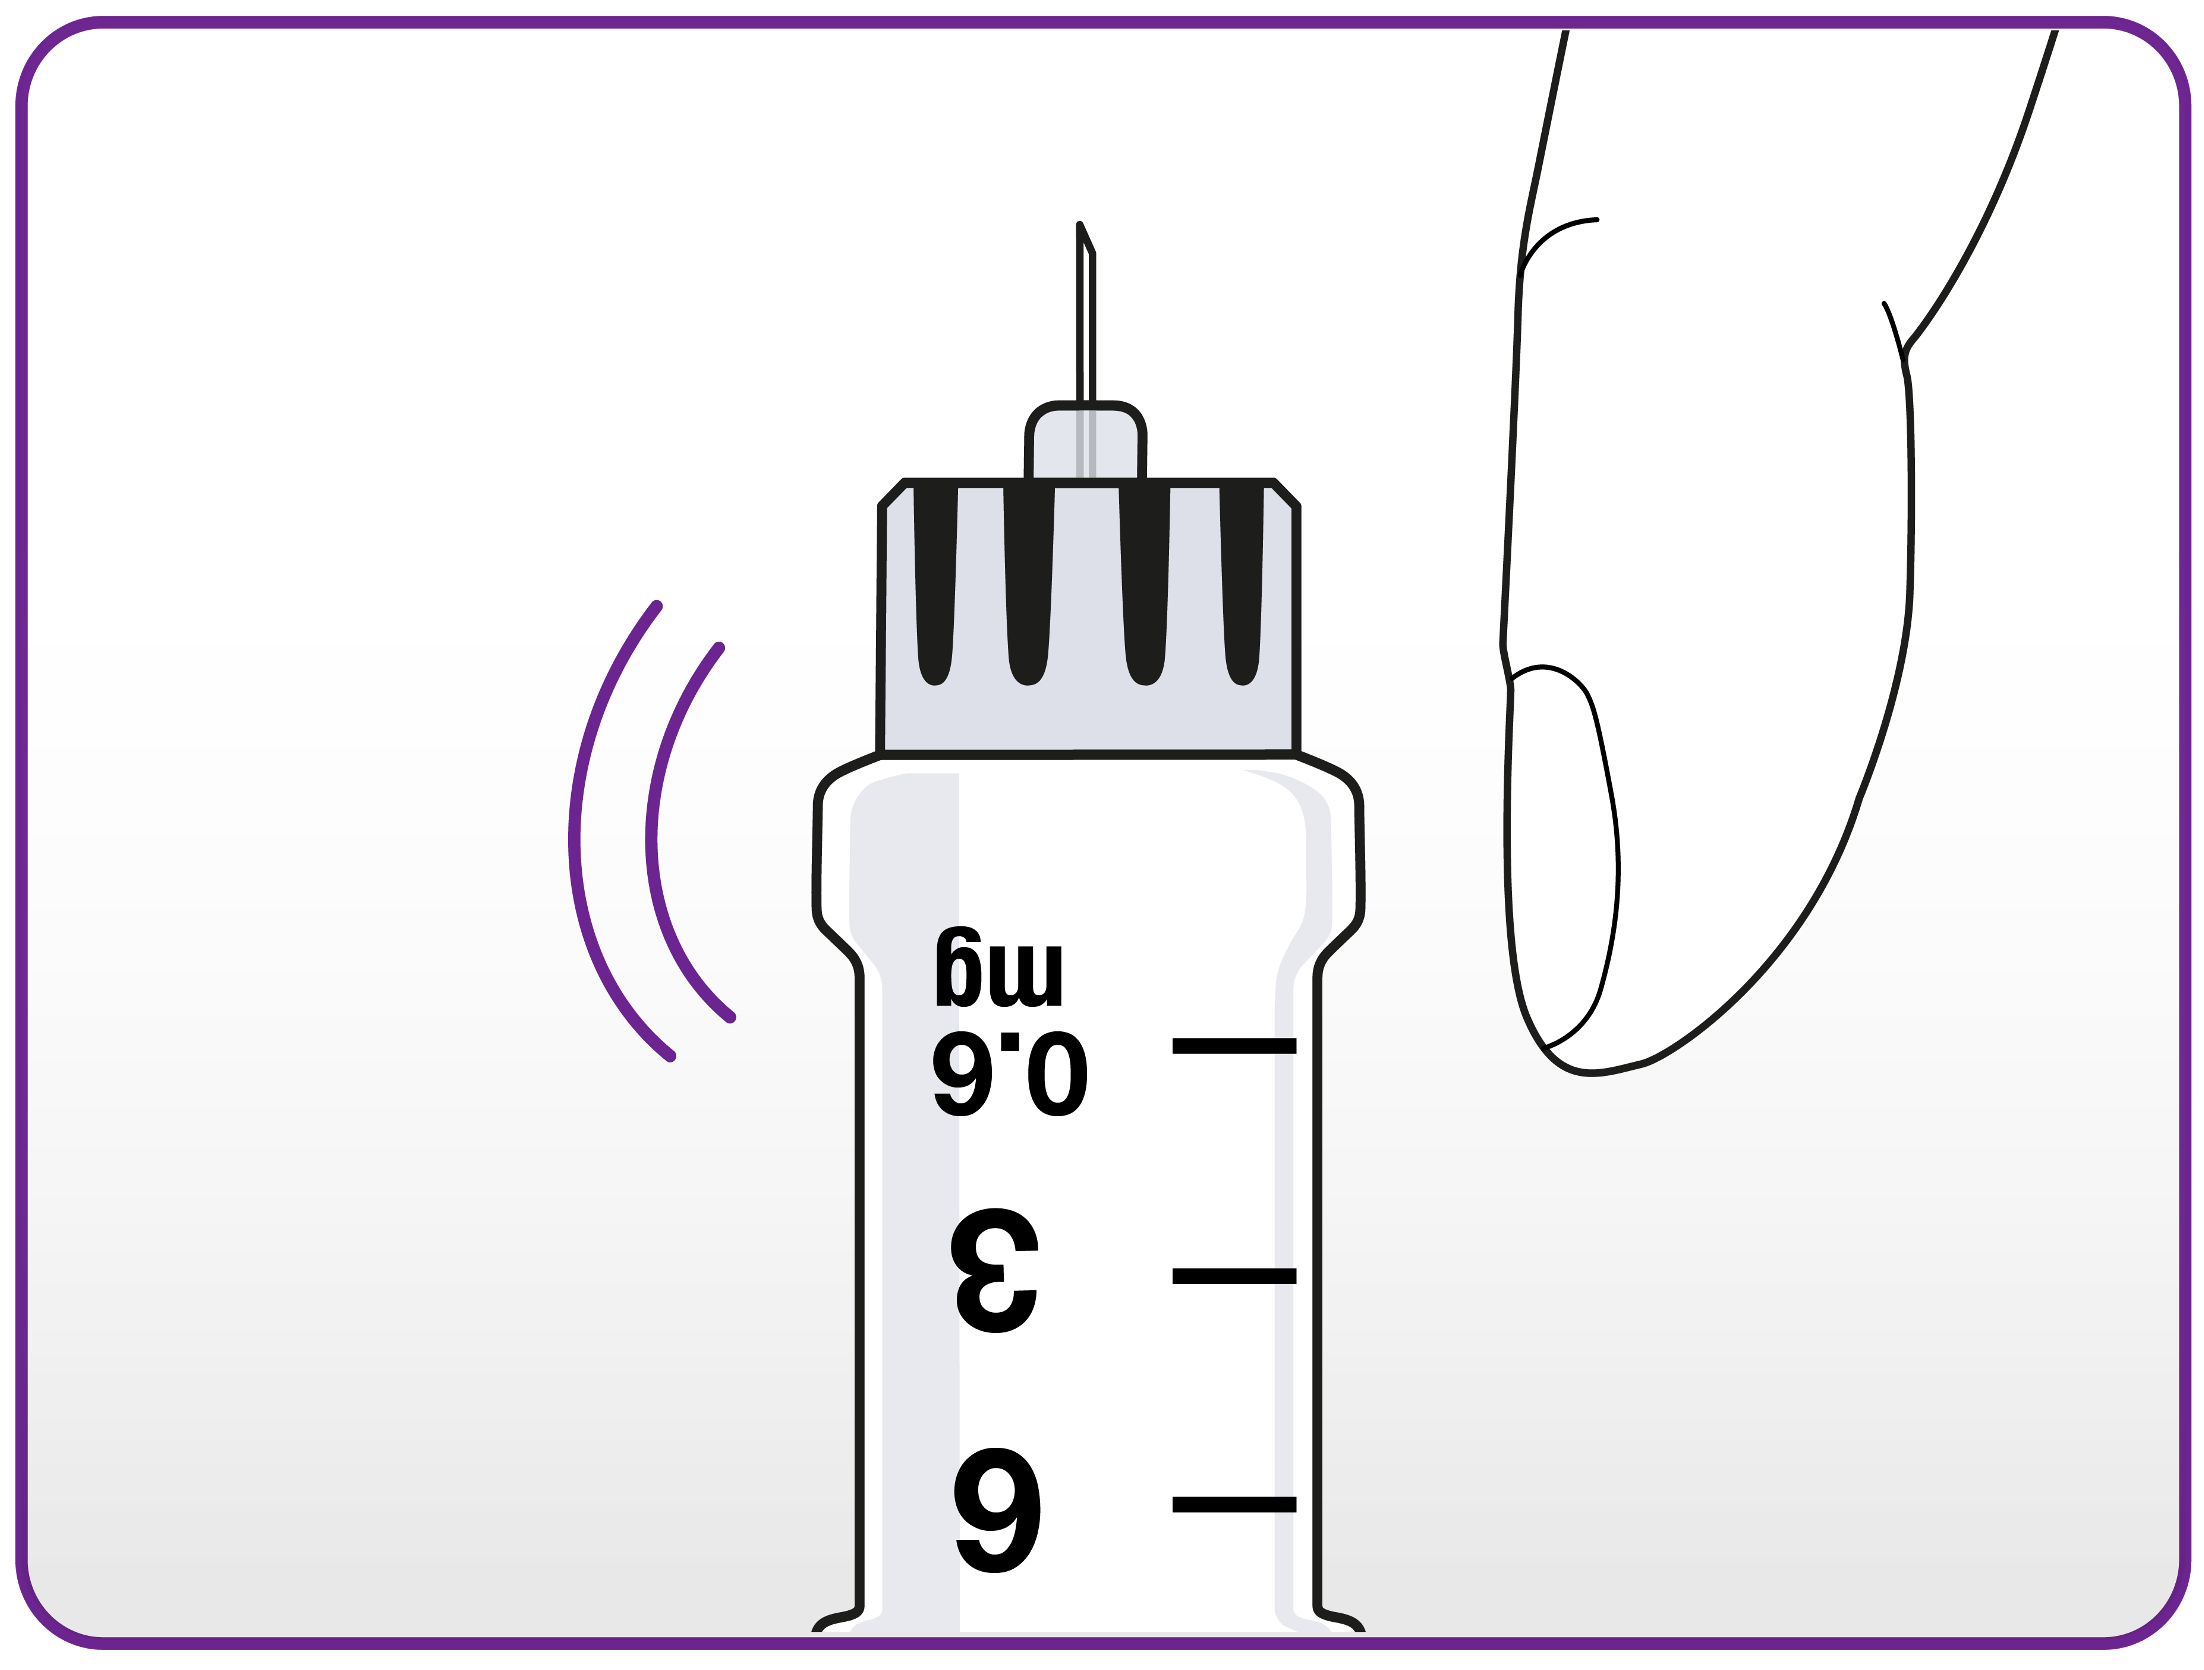
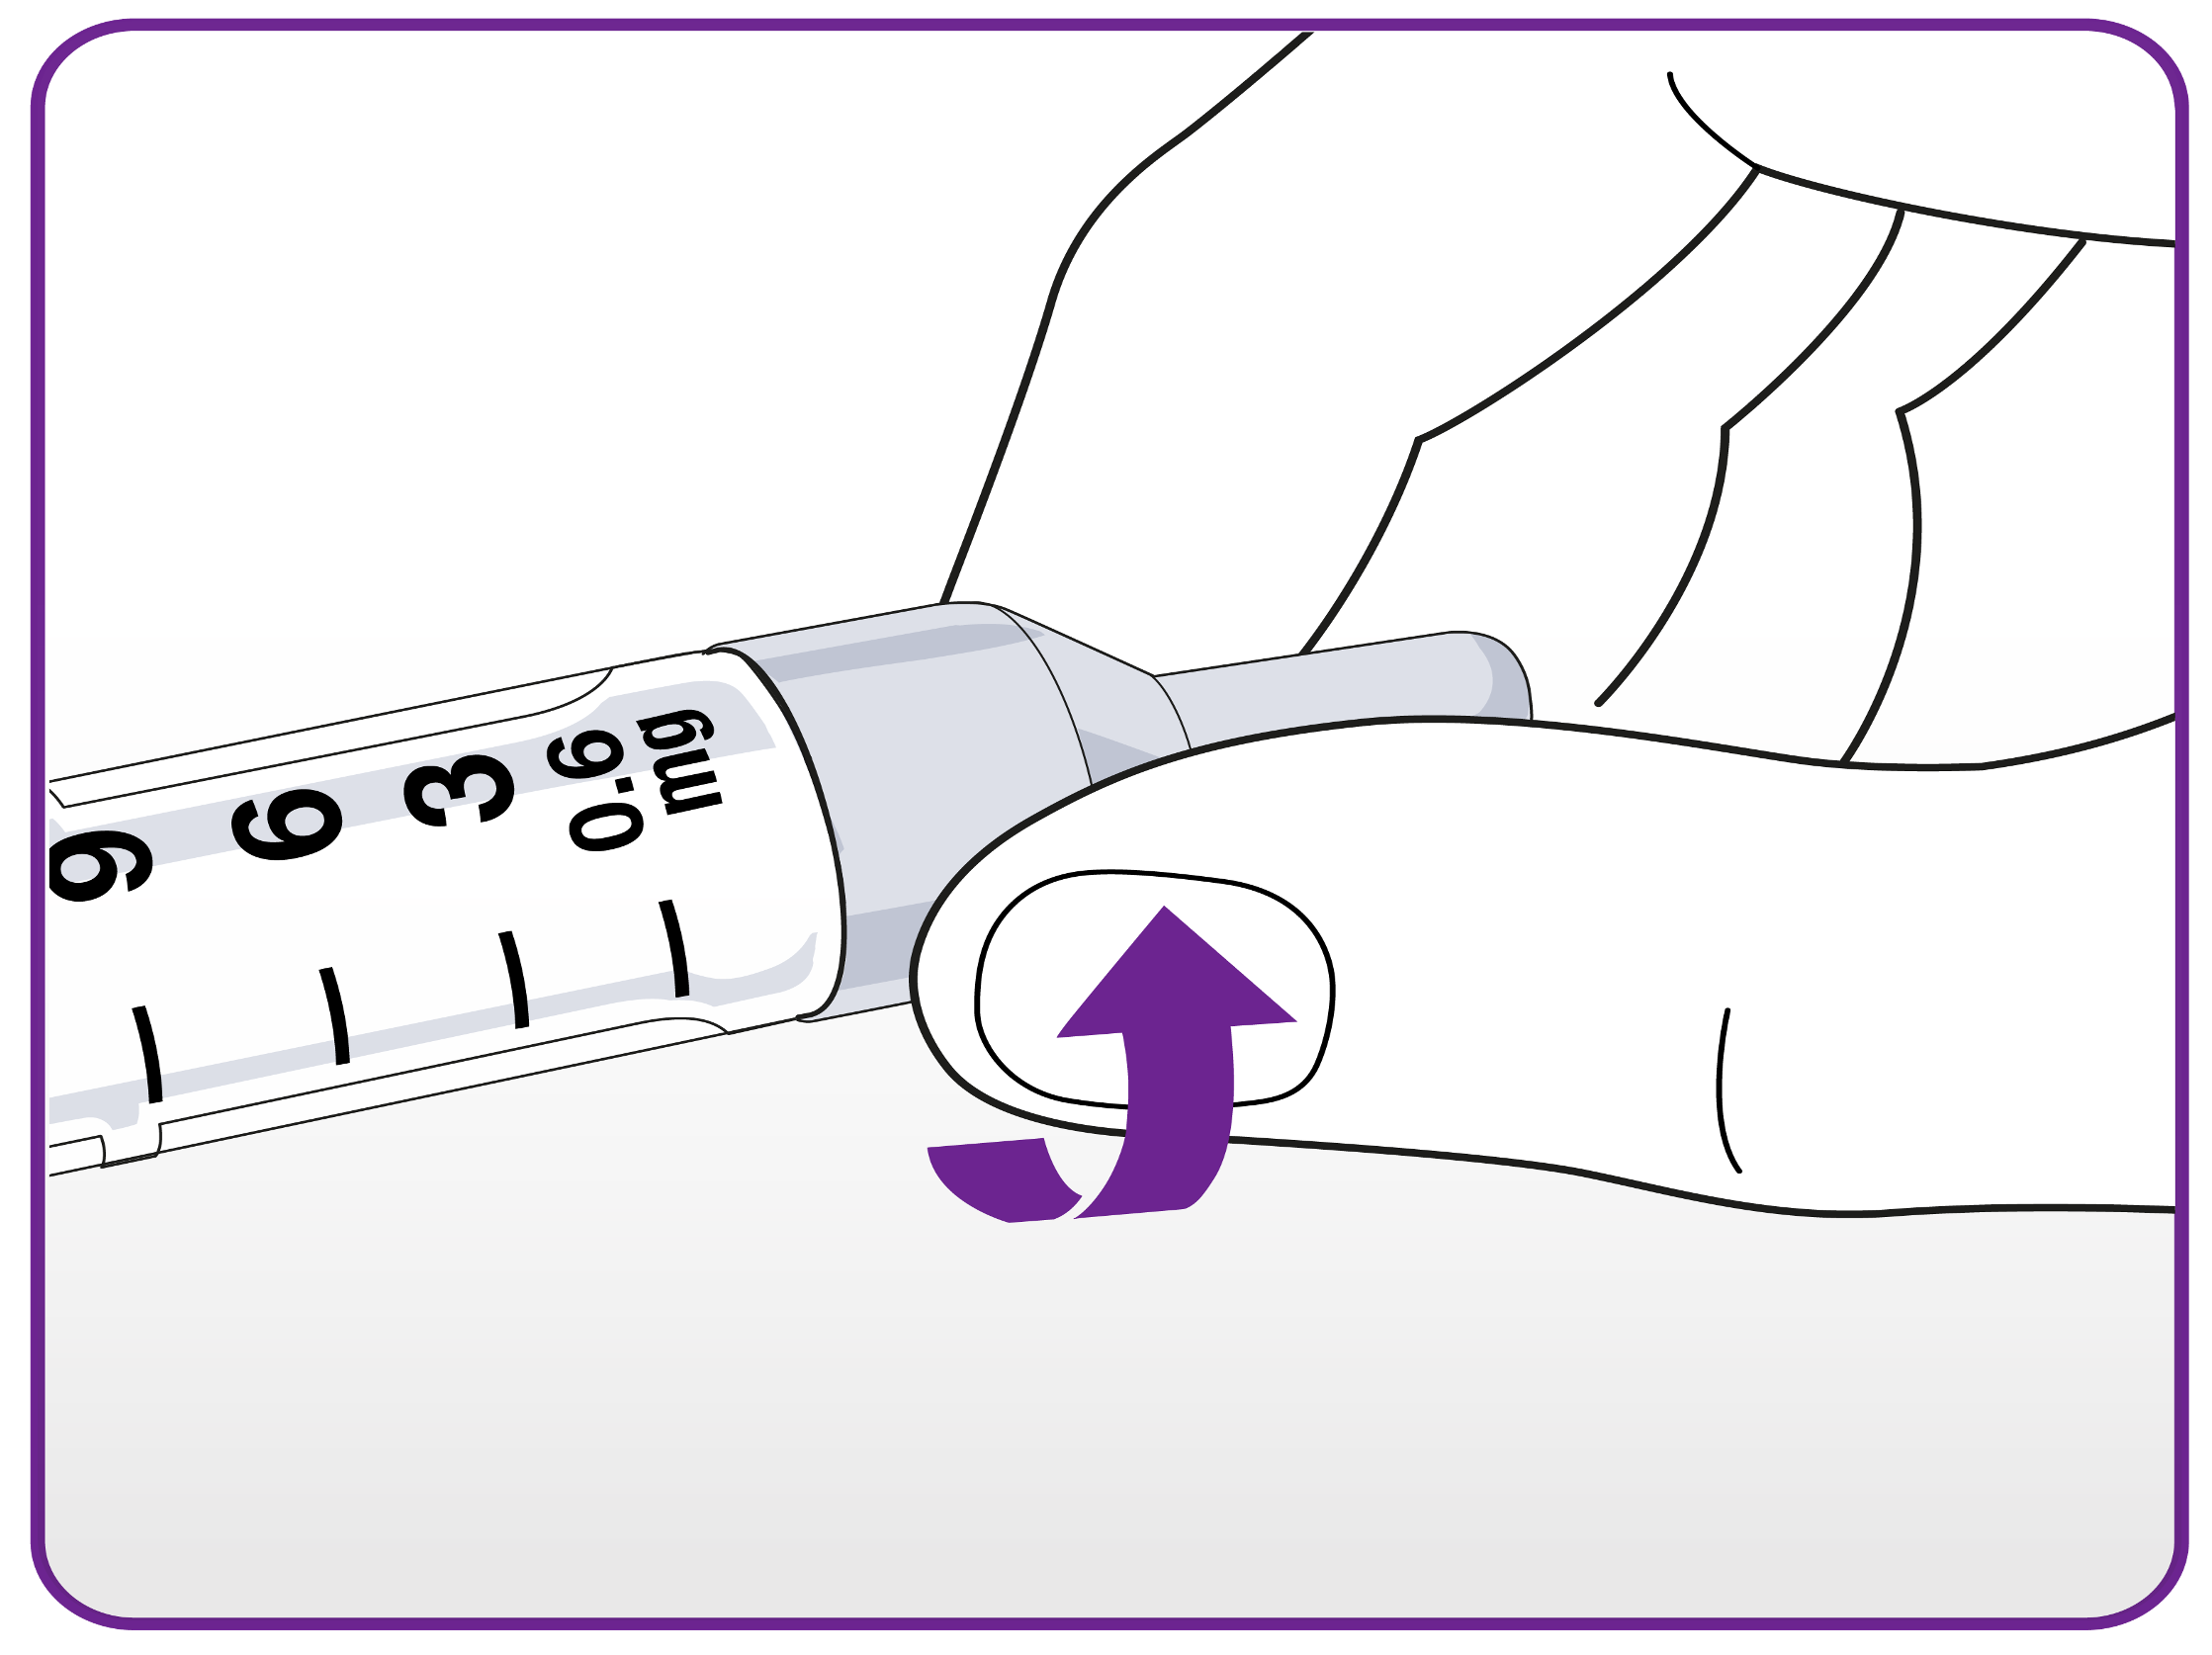
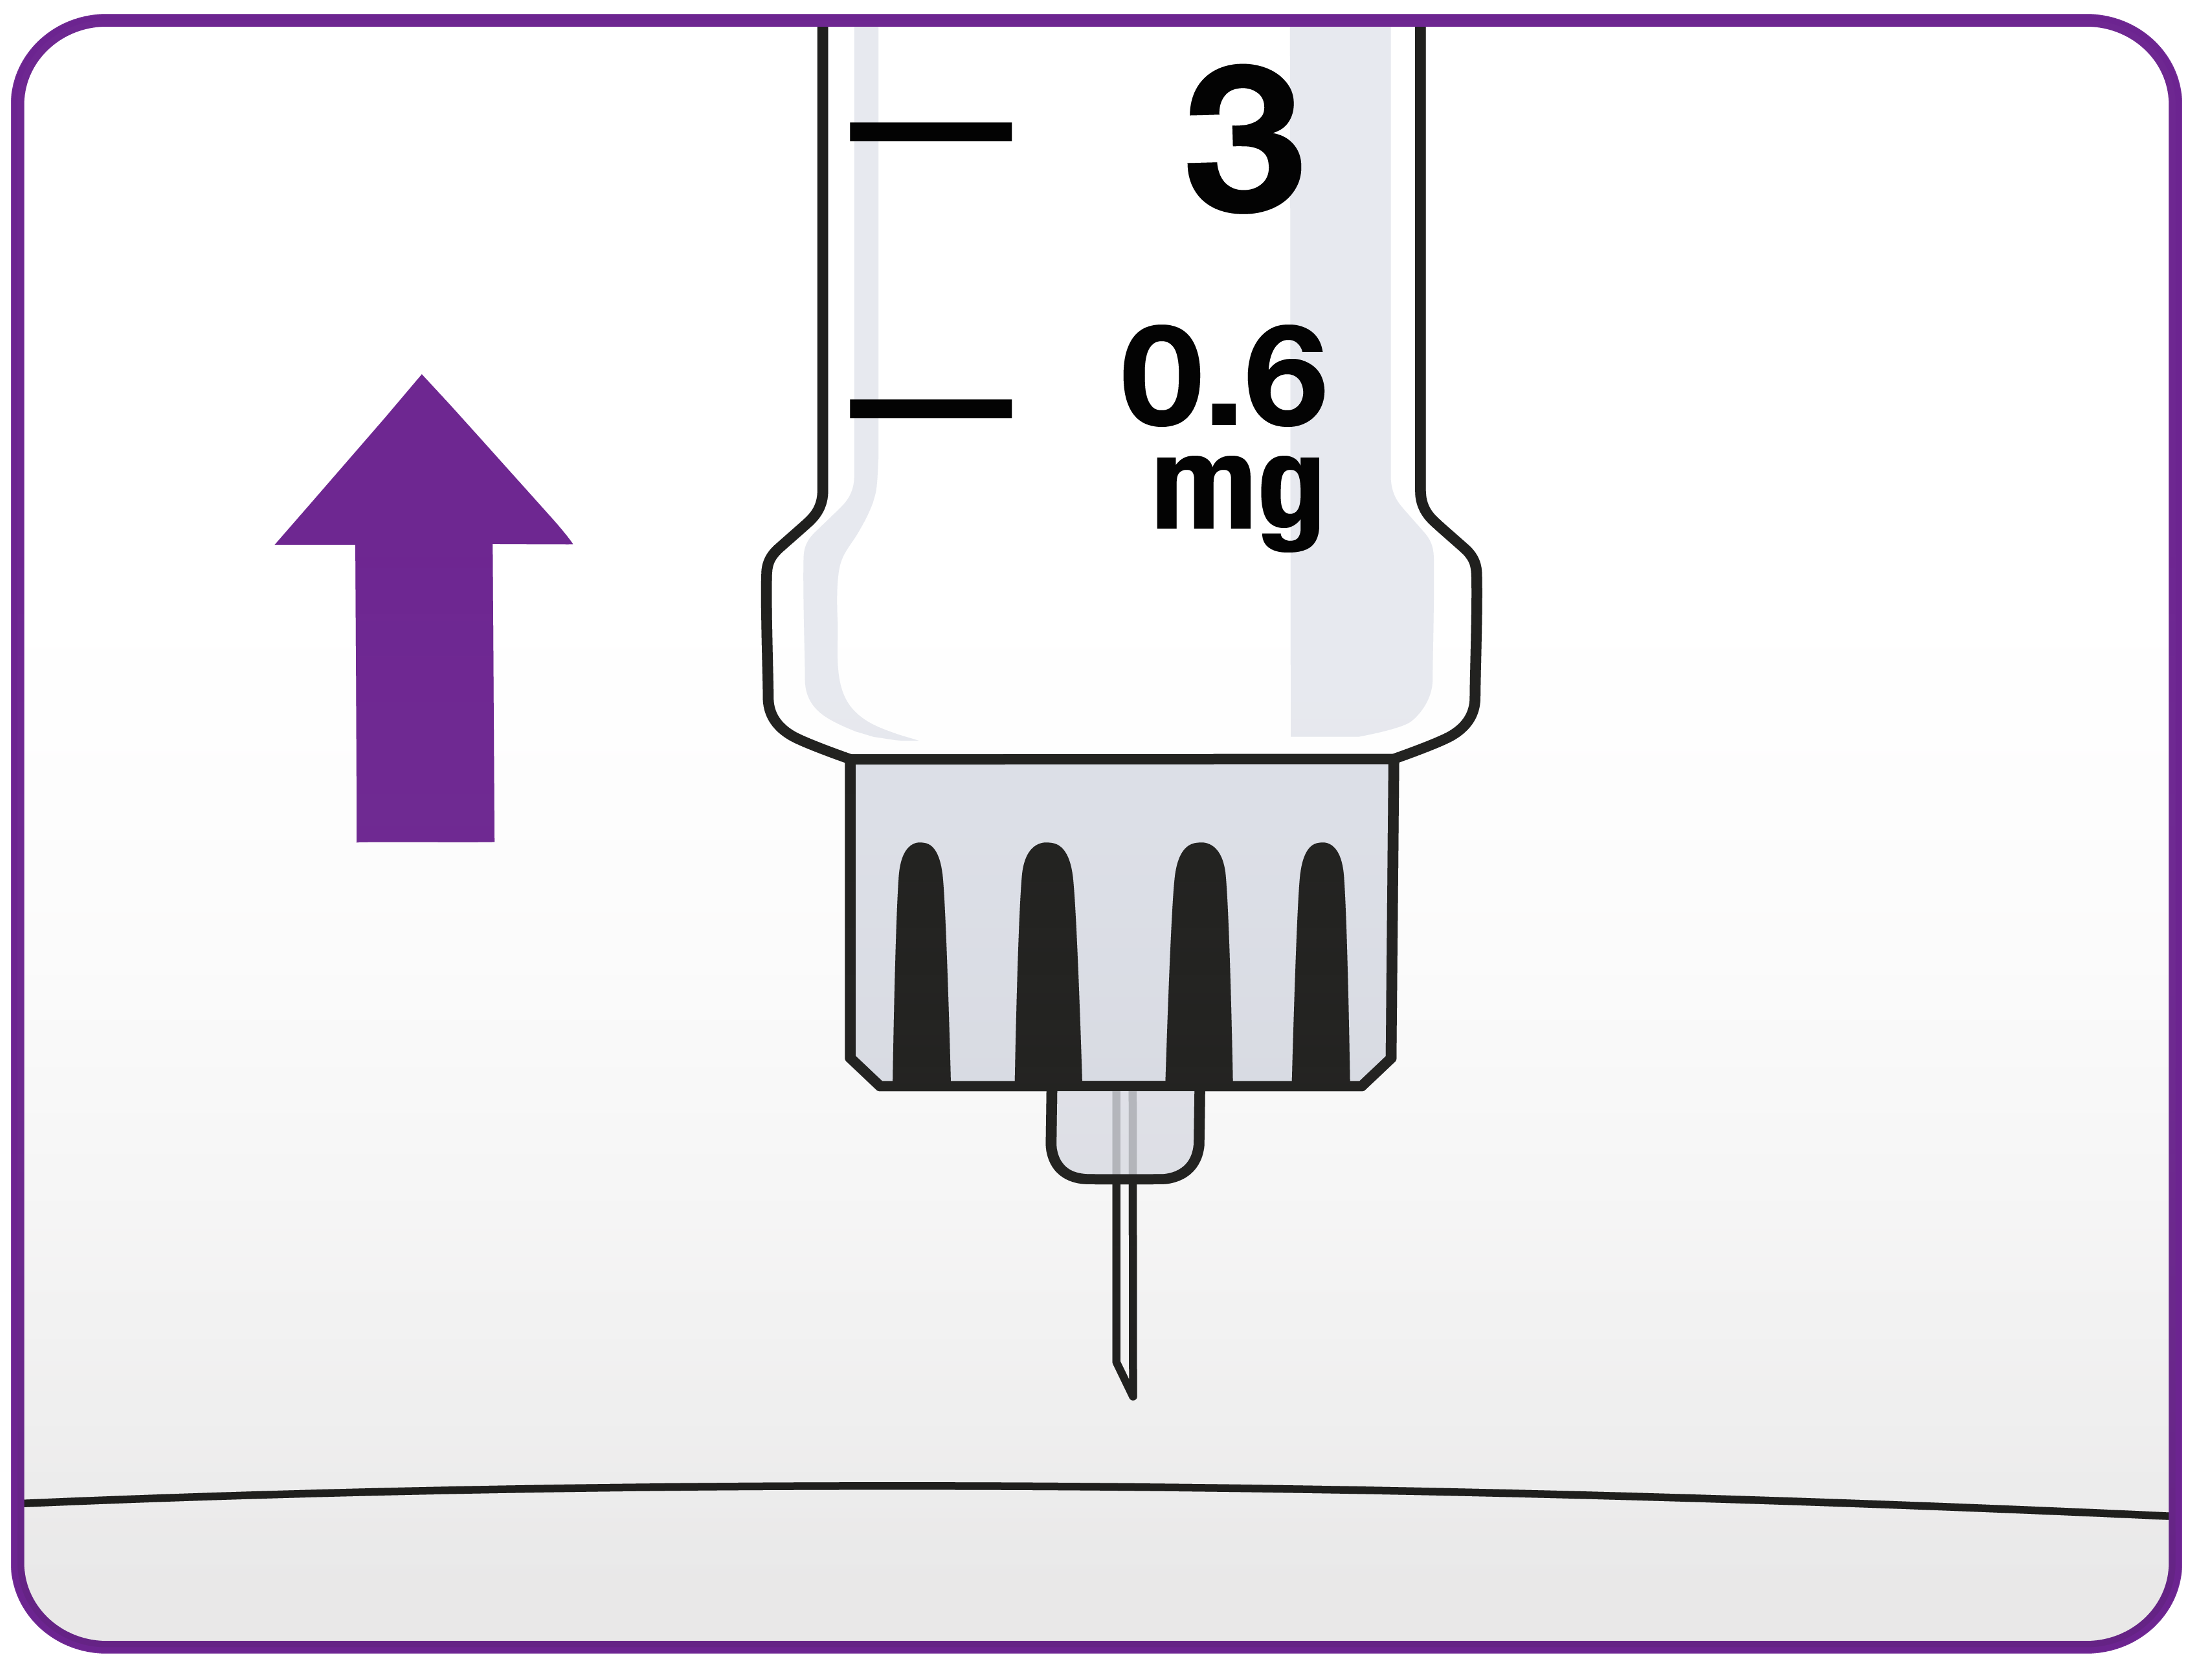
Advise patients to hold the pen with the needle pointing up. They should then tap the cartridge gently with their finger a few times. This will make any air bubbles collect at the top of the cartridge.
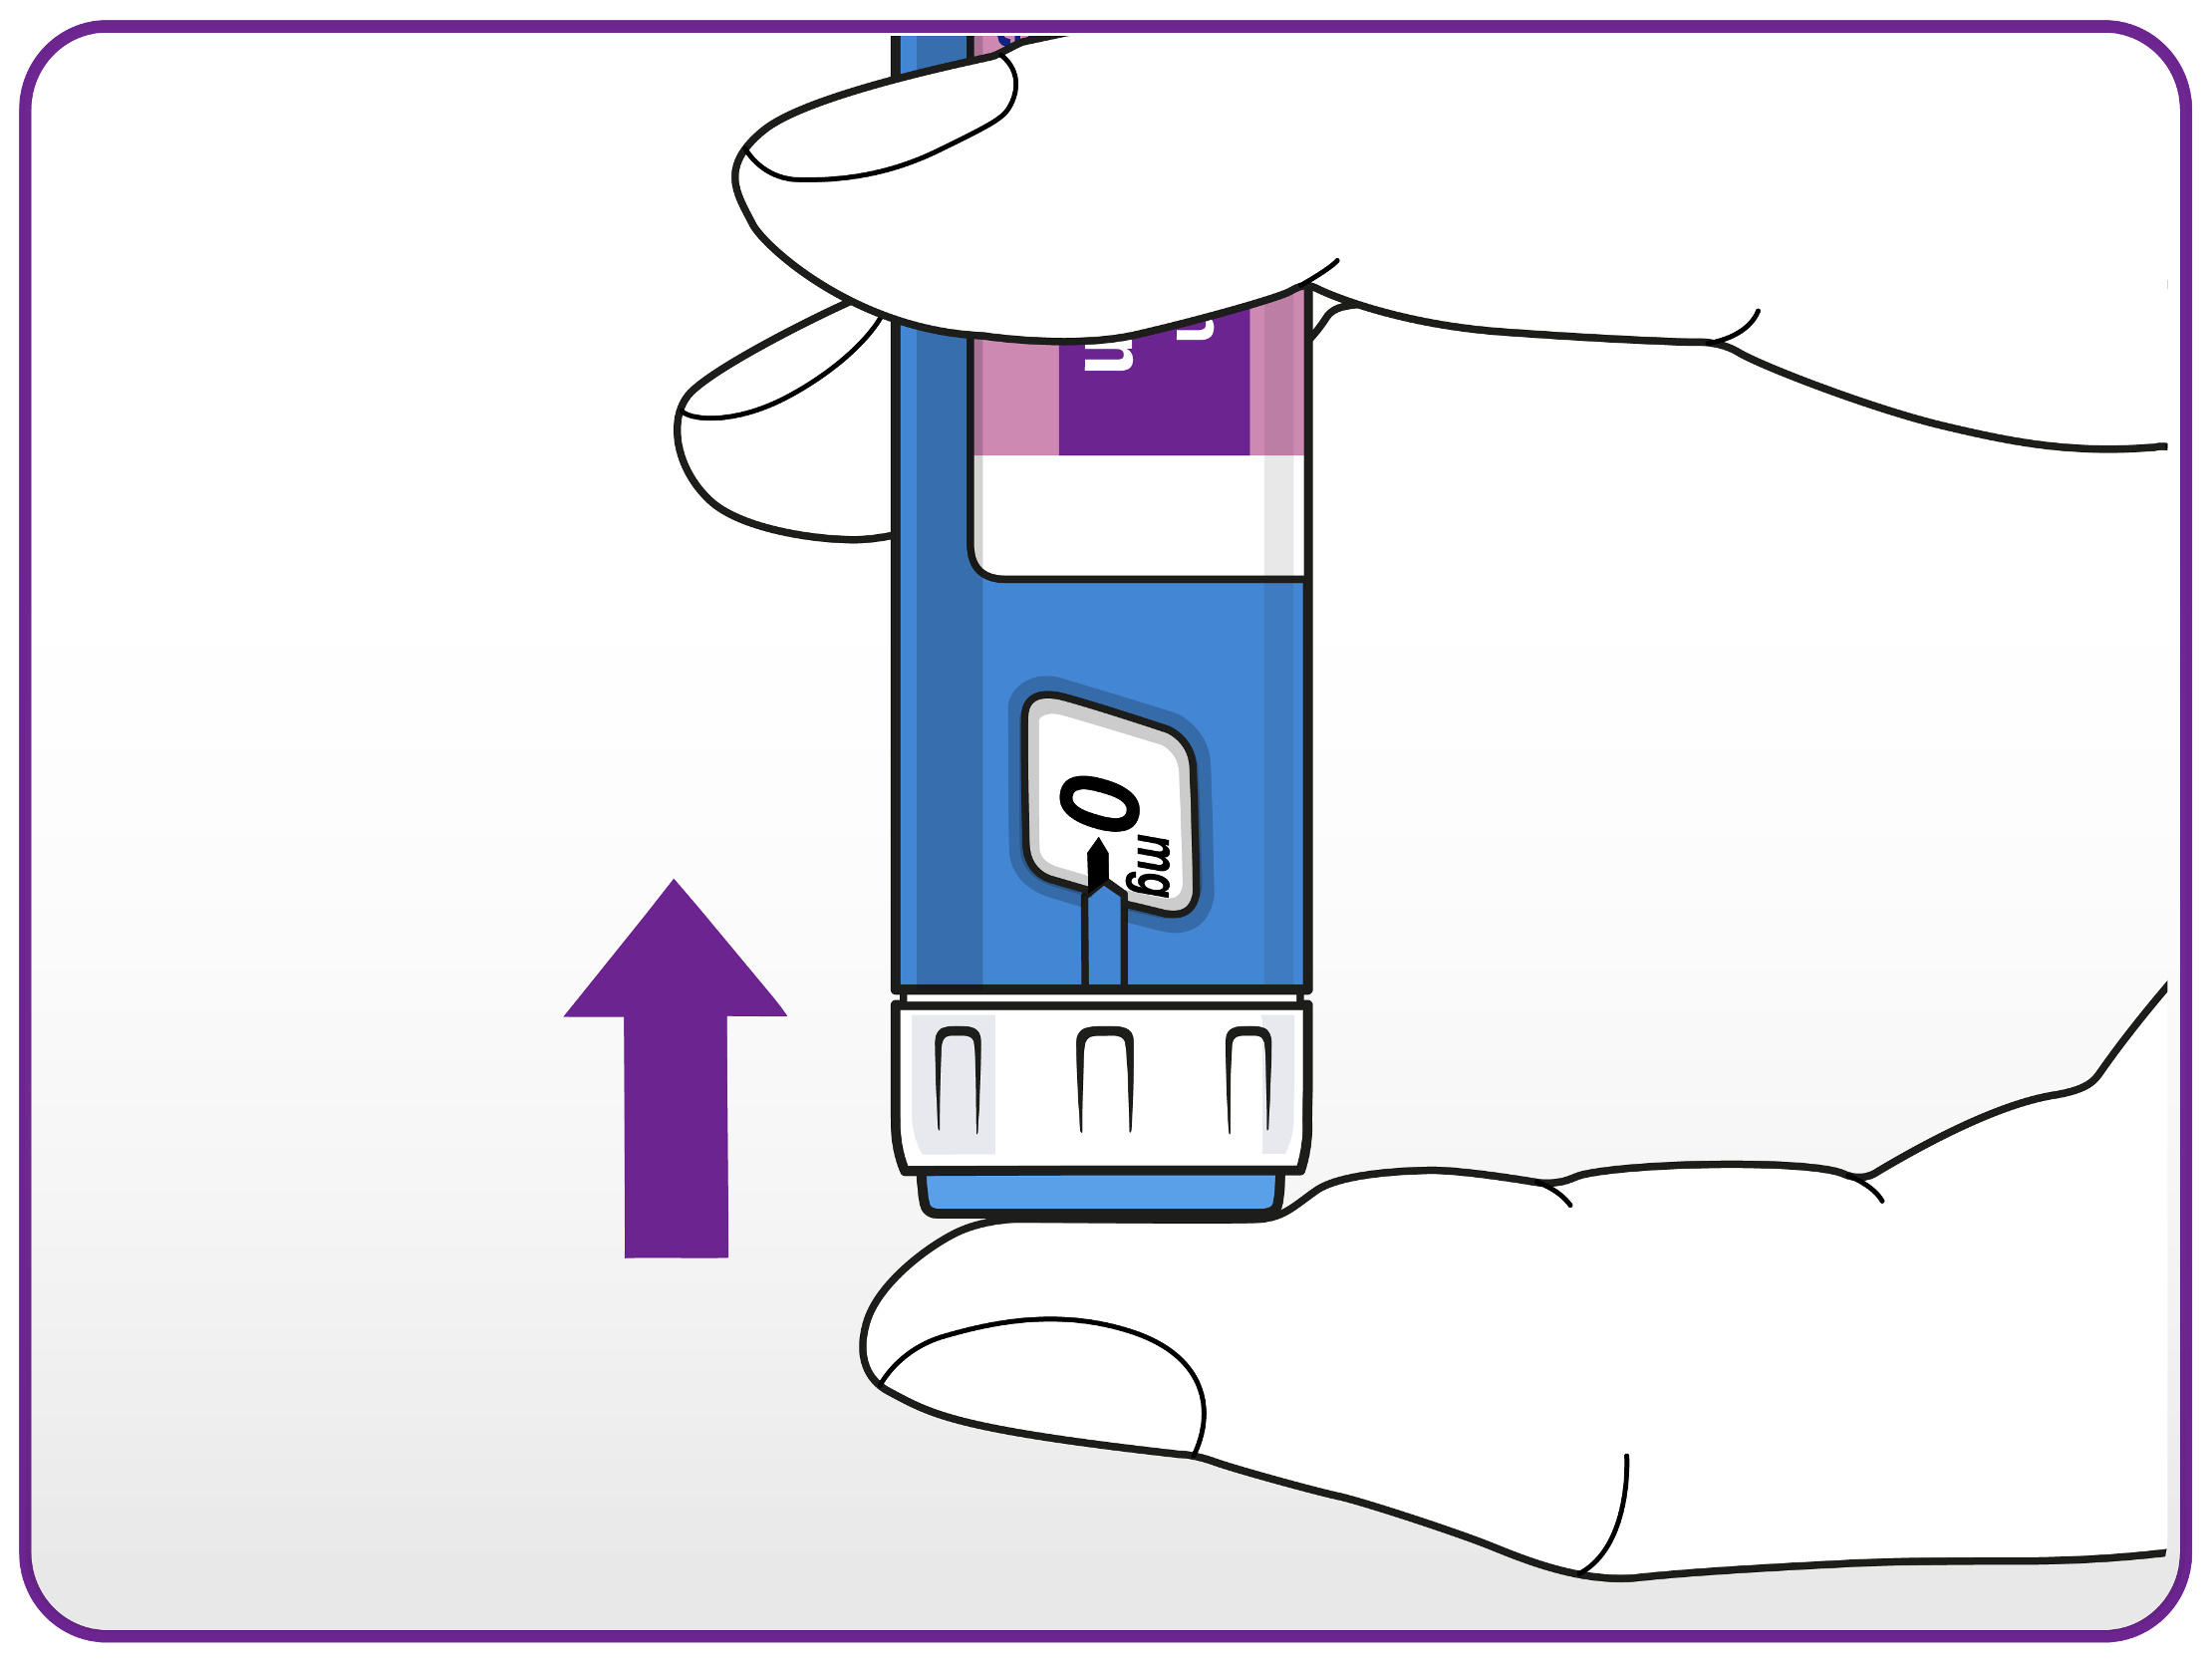
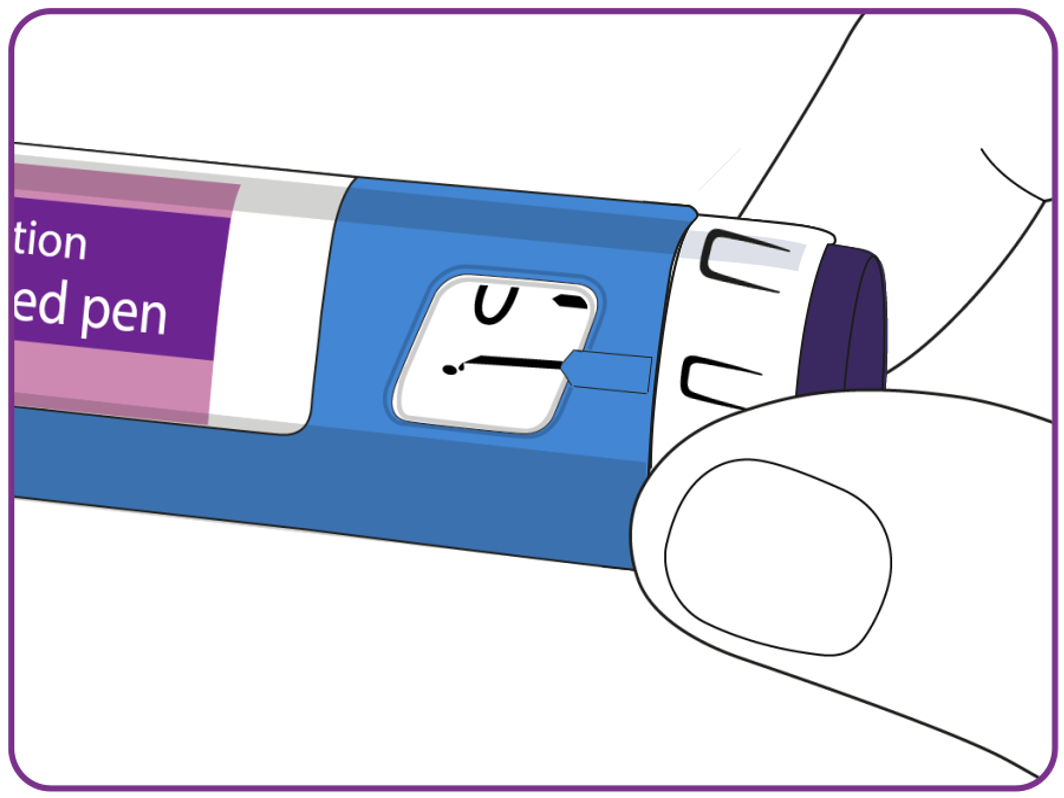
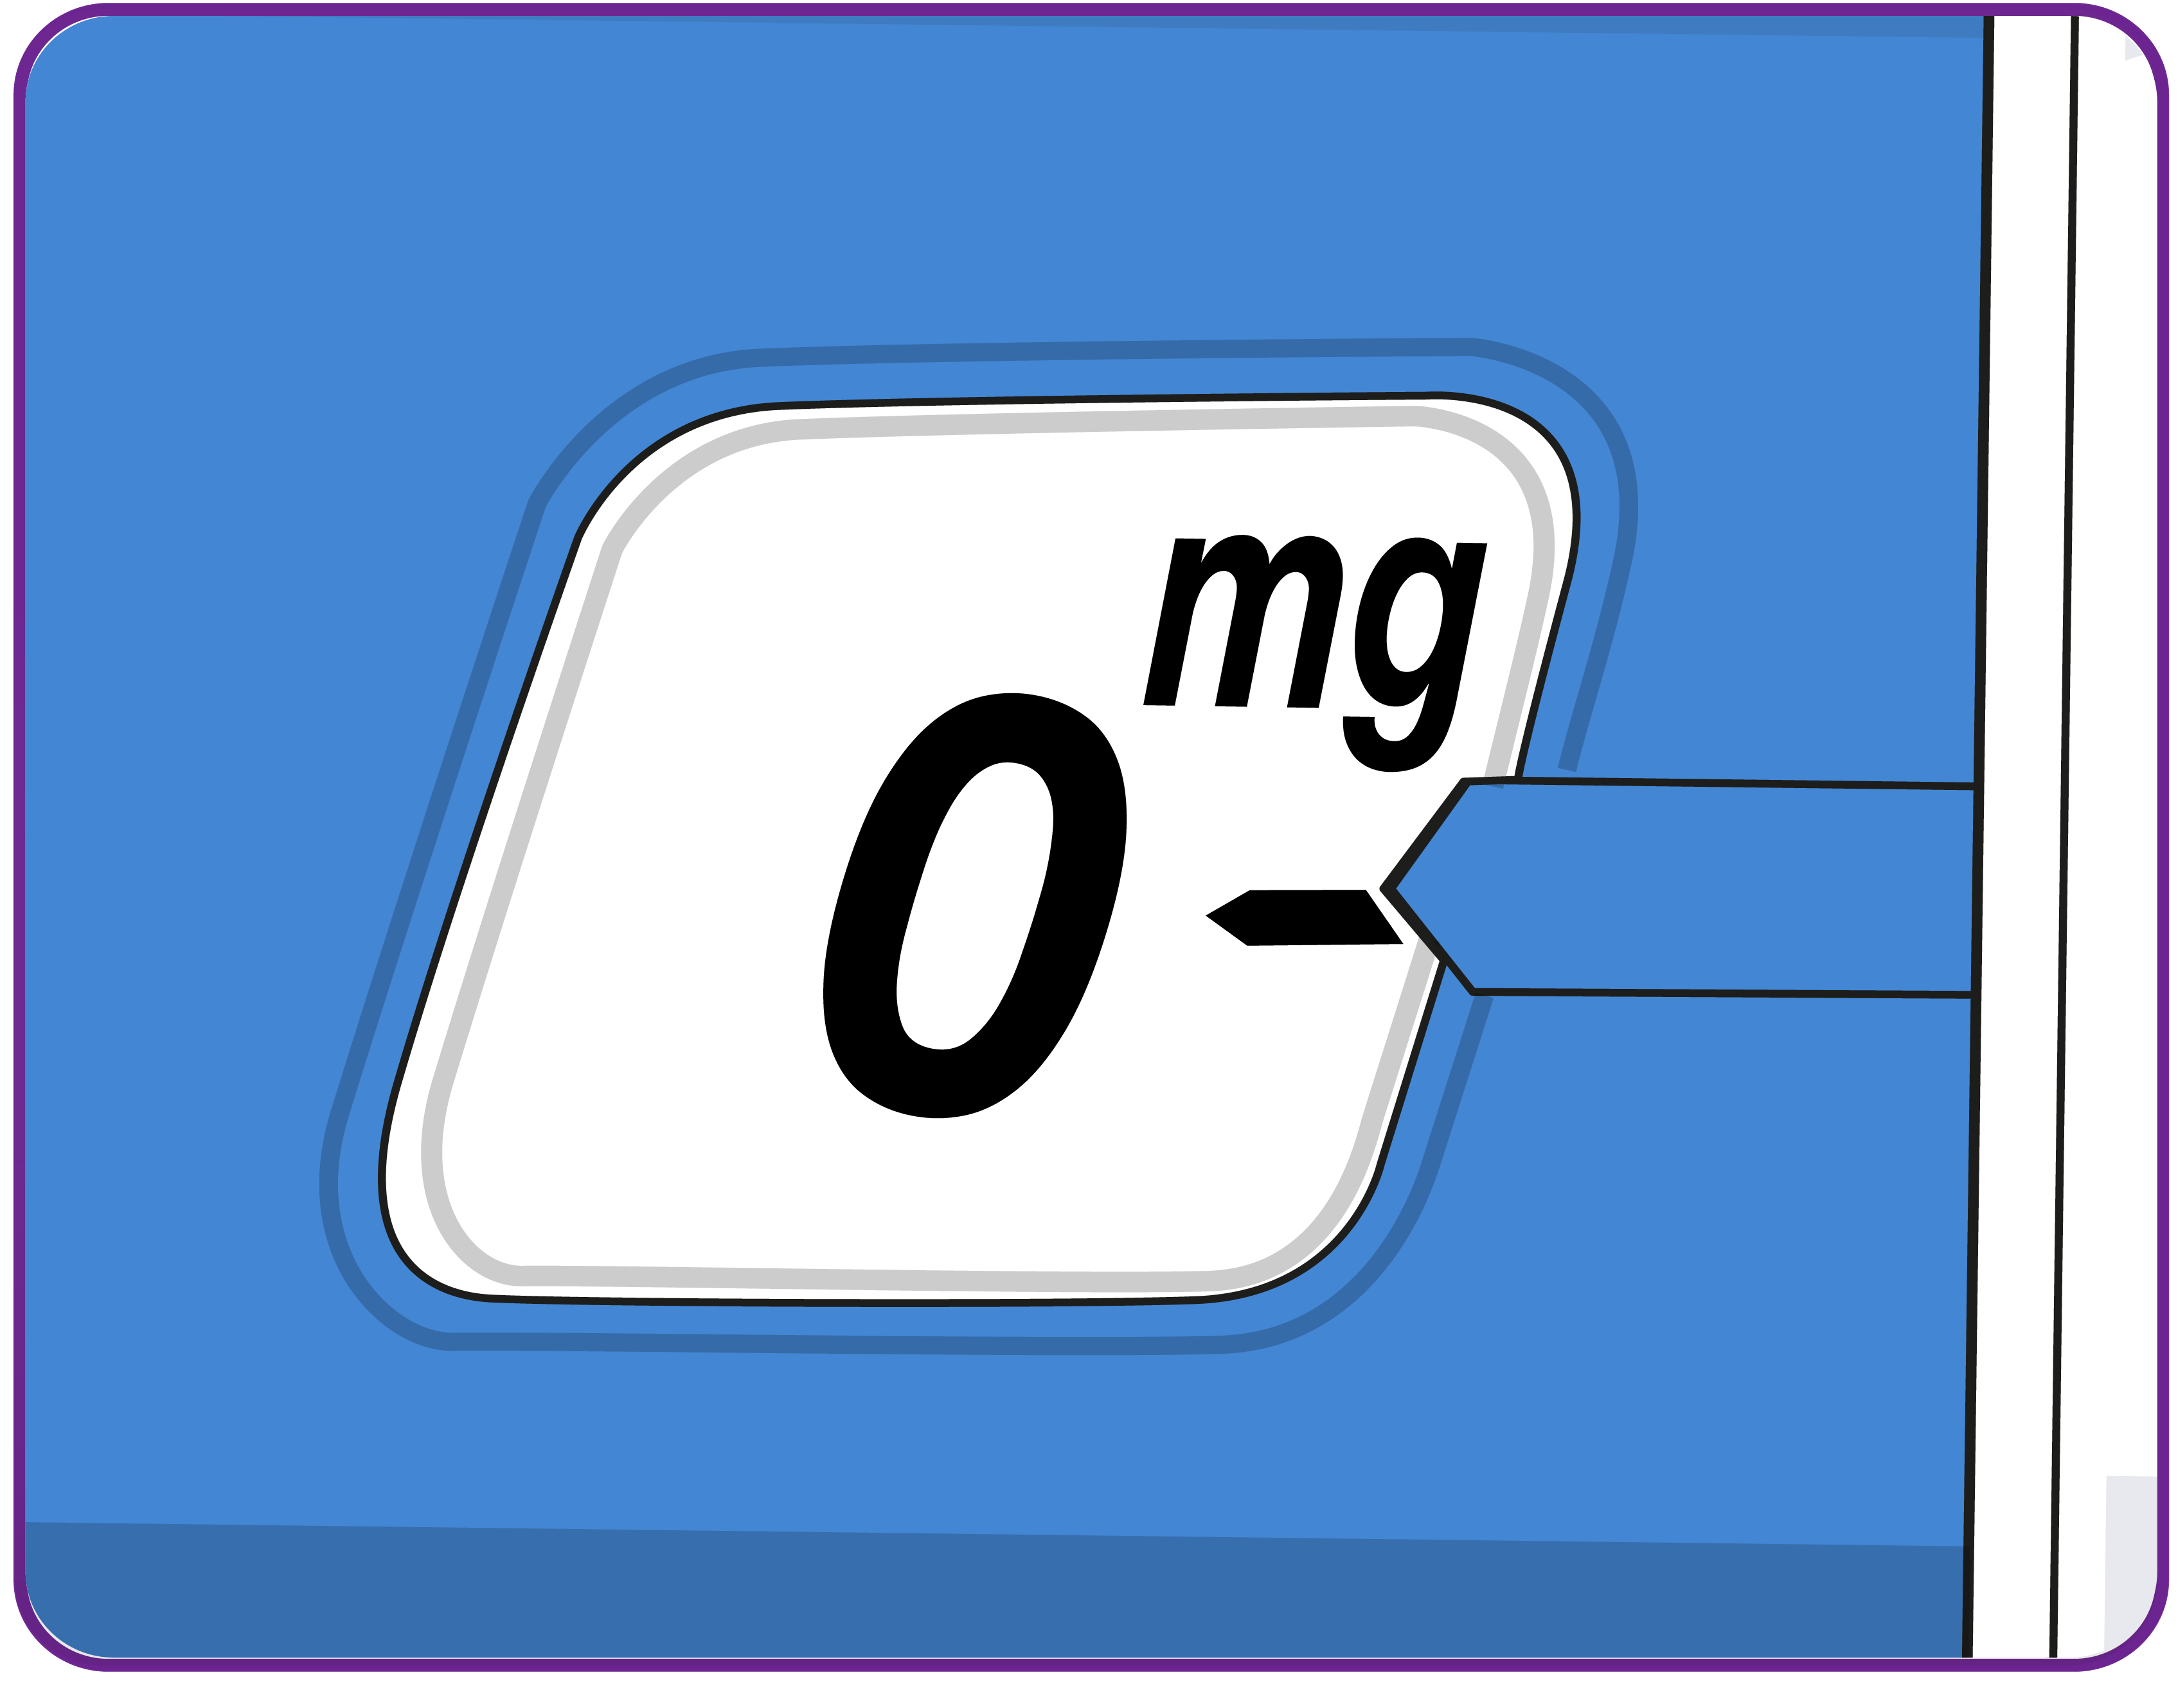
Patients should press and hold in the dose button until the dose counter returns to 0. The 0 must line up with the dose pointer.
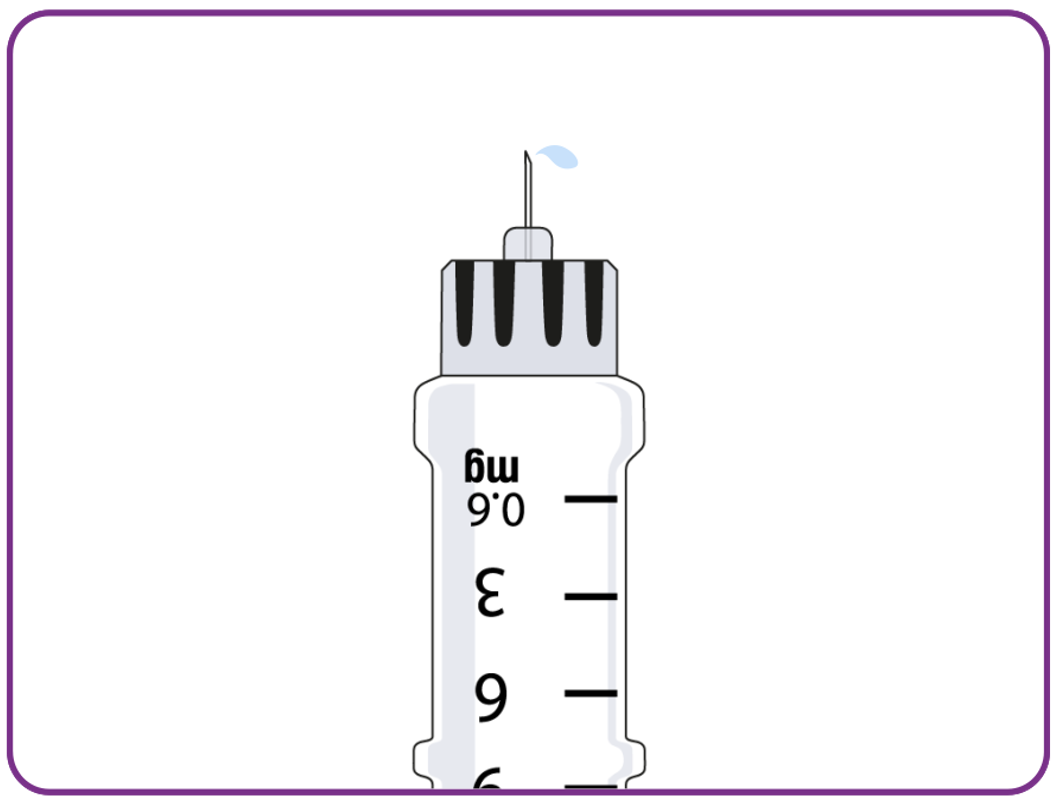
A drop of solution should appear at the needle tip. If no drop appears, this step can be repeated up to 6 times. If there is still no drop, the needle should be changed and the step repeated with the new needle. If a drop still does not appear, the pen should be disposed of and a new pen used. If patients do not check the flow before each injection, they may not get the prescribed dose.
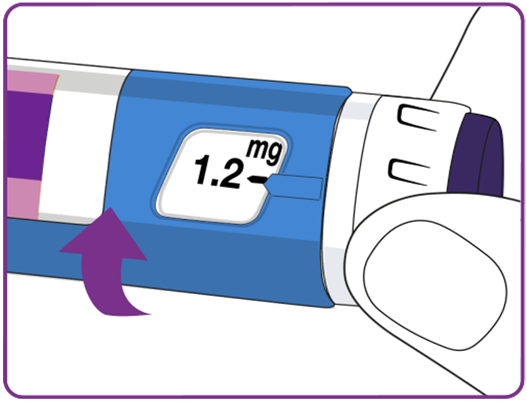
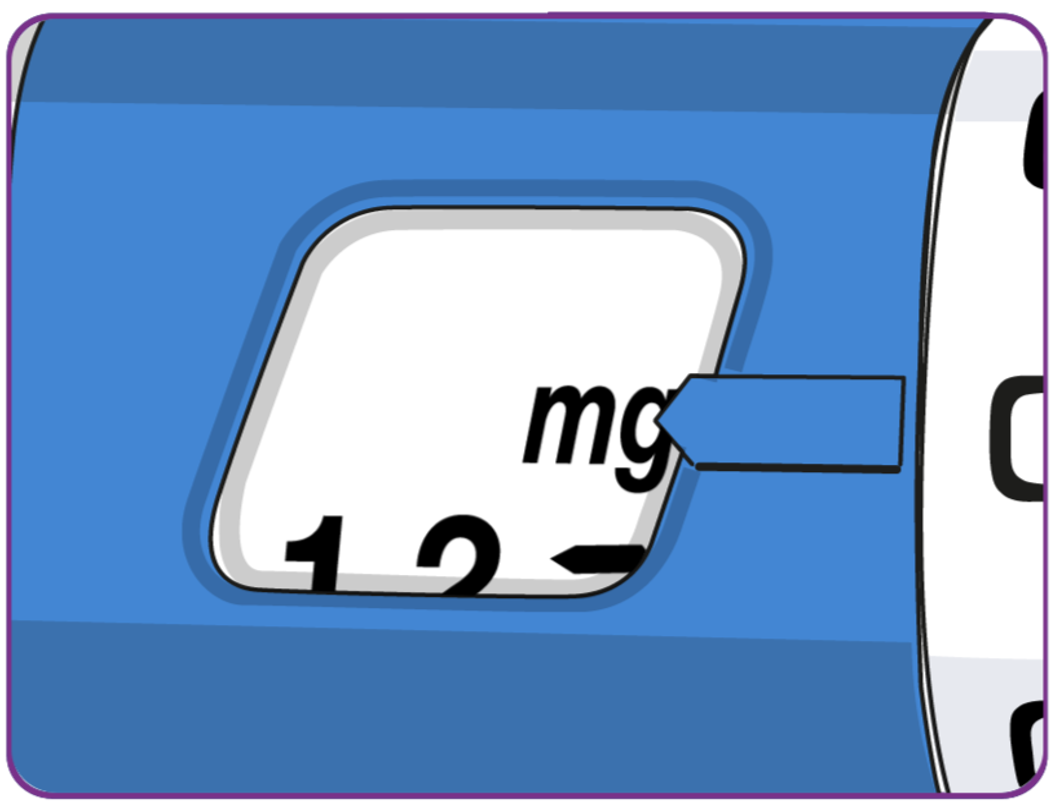
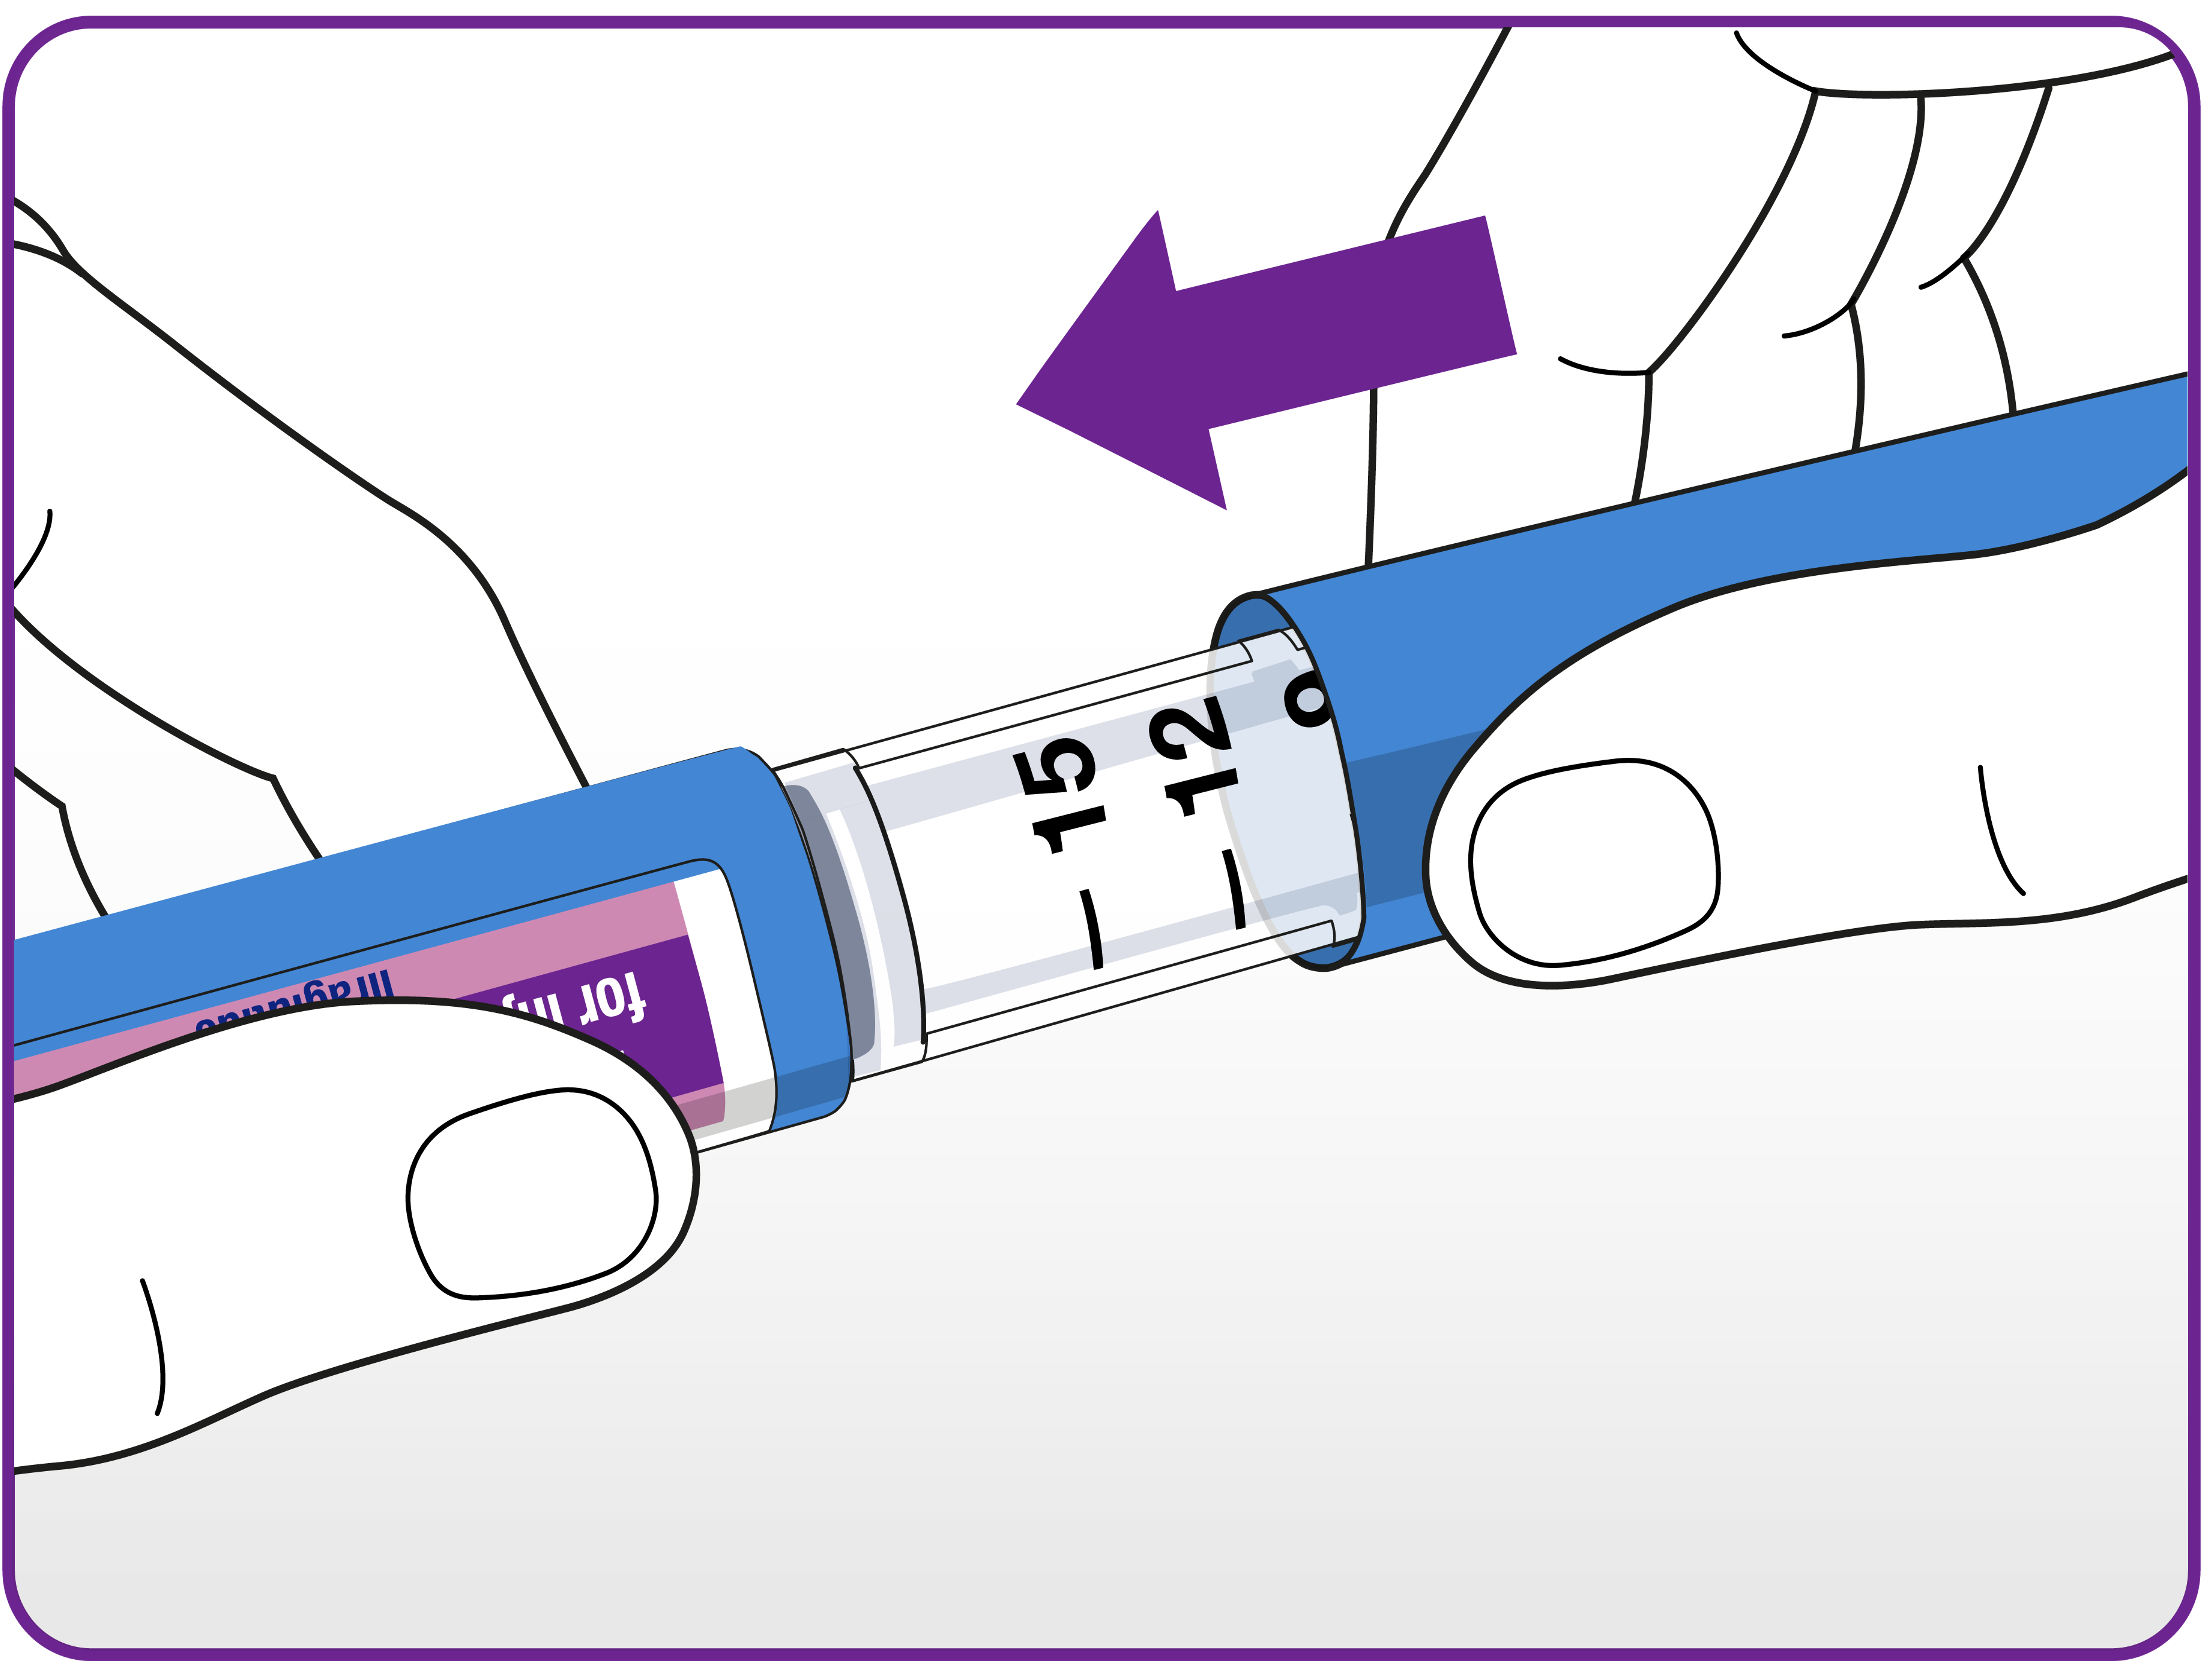
Selecting their dose. Only doses of 0.6 mg, 1.2 mg, 1.8 mg, 2.4 mg or 3.0 mg must be selected. If the wrong dose is selected, the dose selector can be turned forwards or backwards to the correct dose. Only the dose counter and dose pointer will show how many mg have been selected per dose.
If the dose counter stops before their selected dose there is not enough solution left for a full dose. If more medicine is needed than left in their pen, they can split their dose, but only if they have been trained by their doctor or nurse. Patients should be very careful to calculate their split-dose correctly. If they are not sure how to split their dose using two pens, then they should inject the dose needed with a new pen and discard the old one.
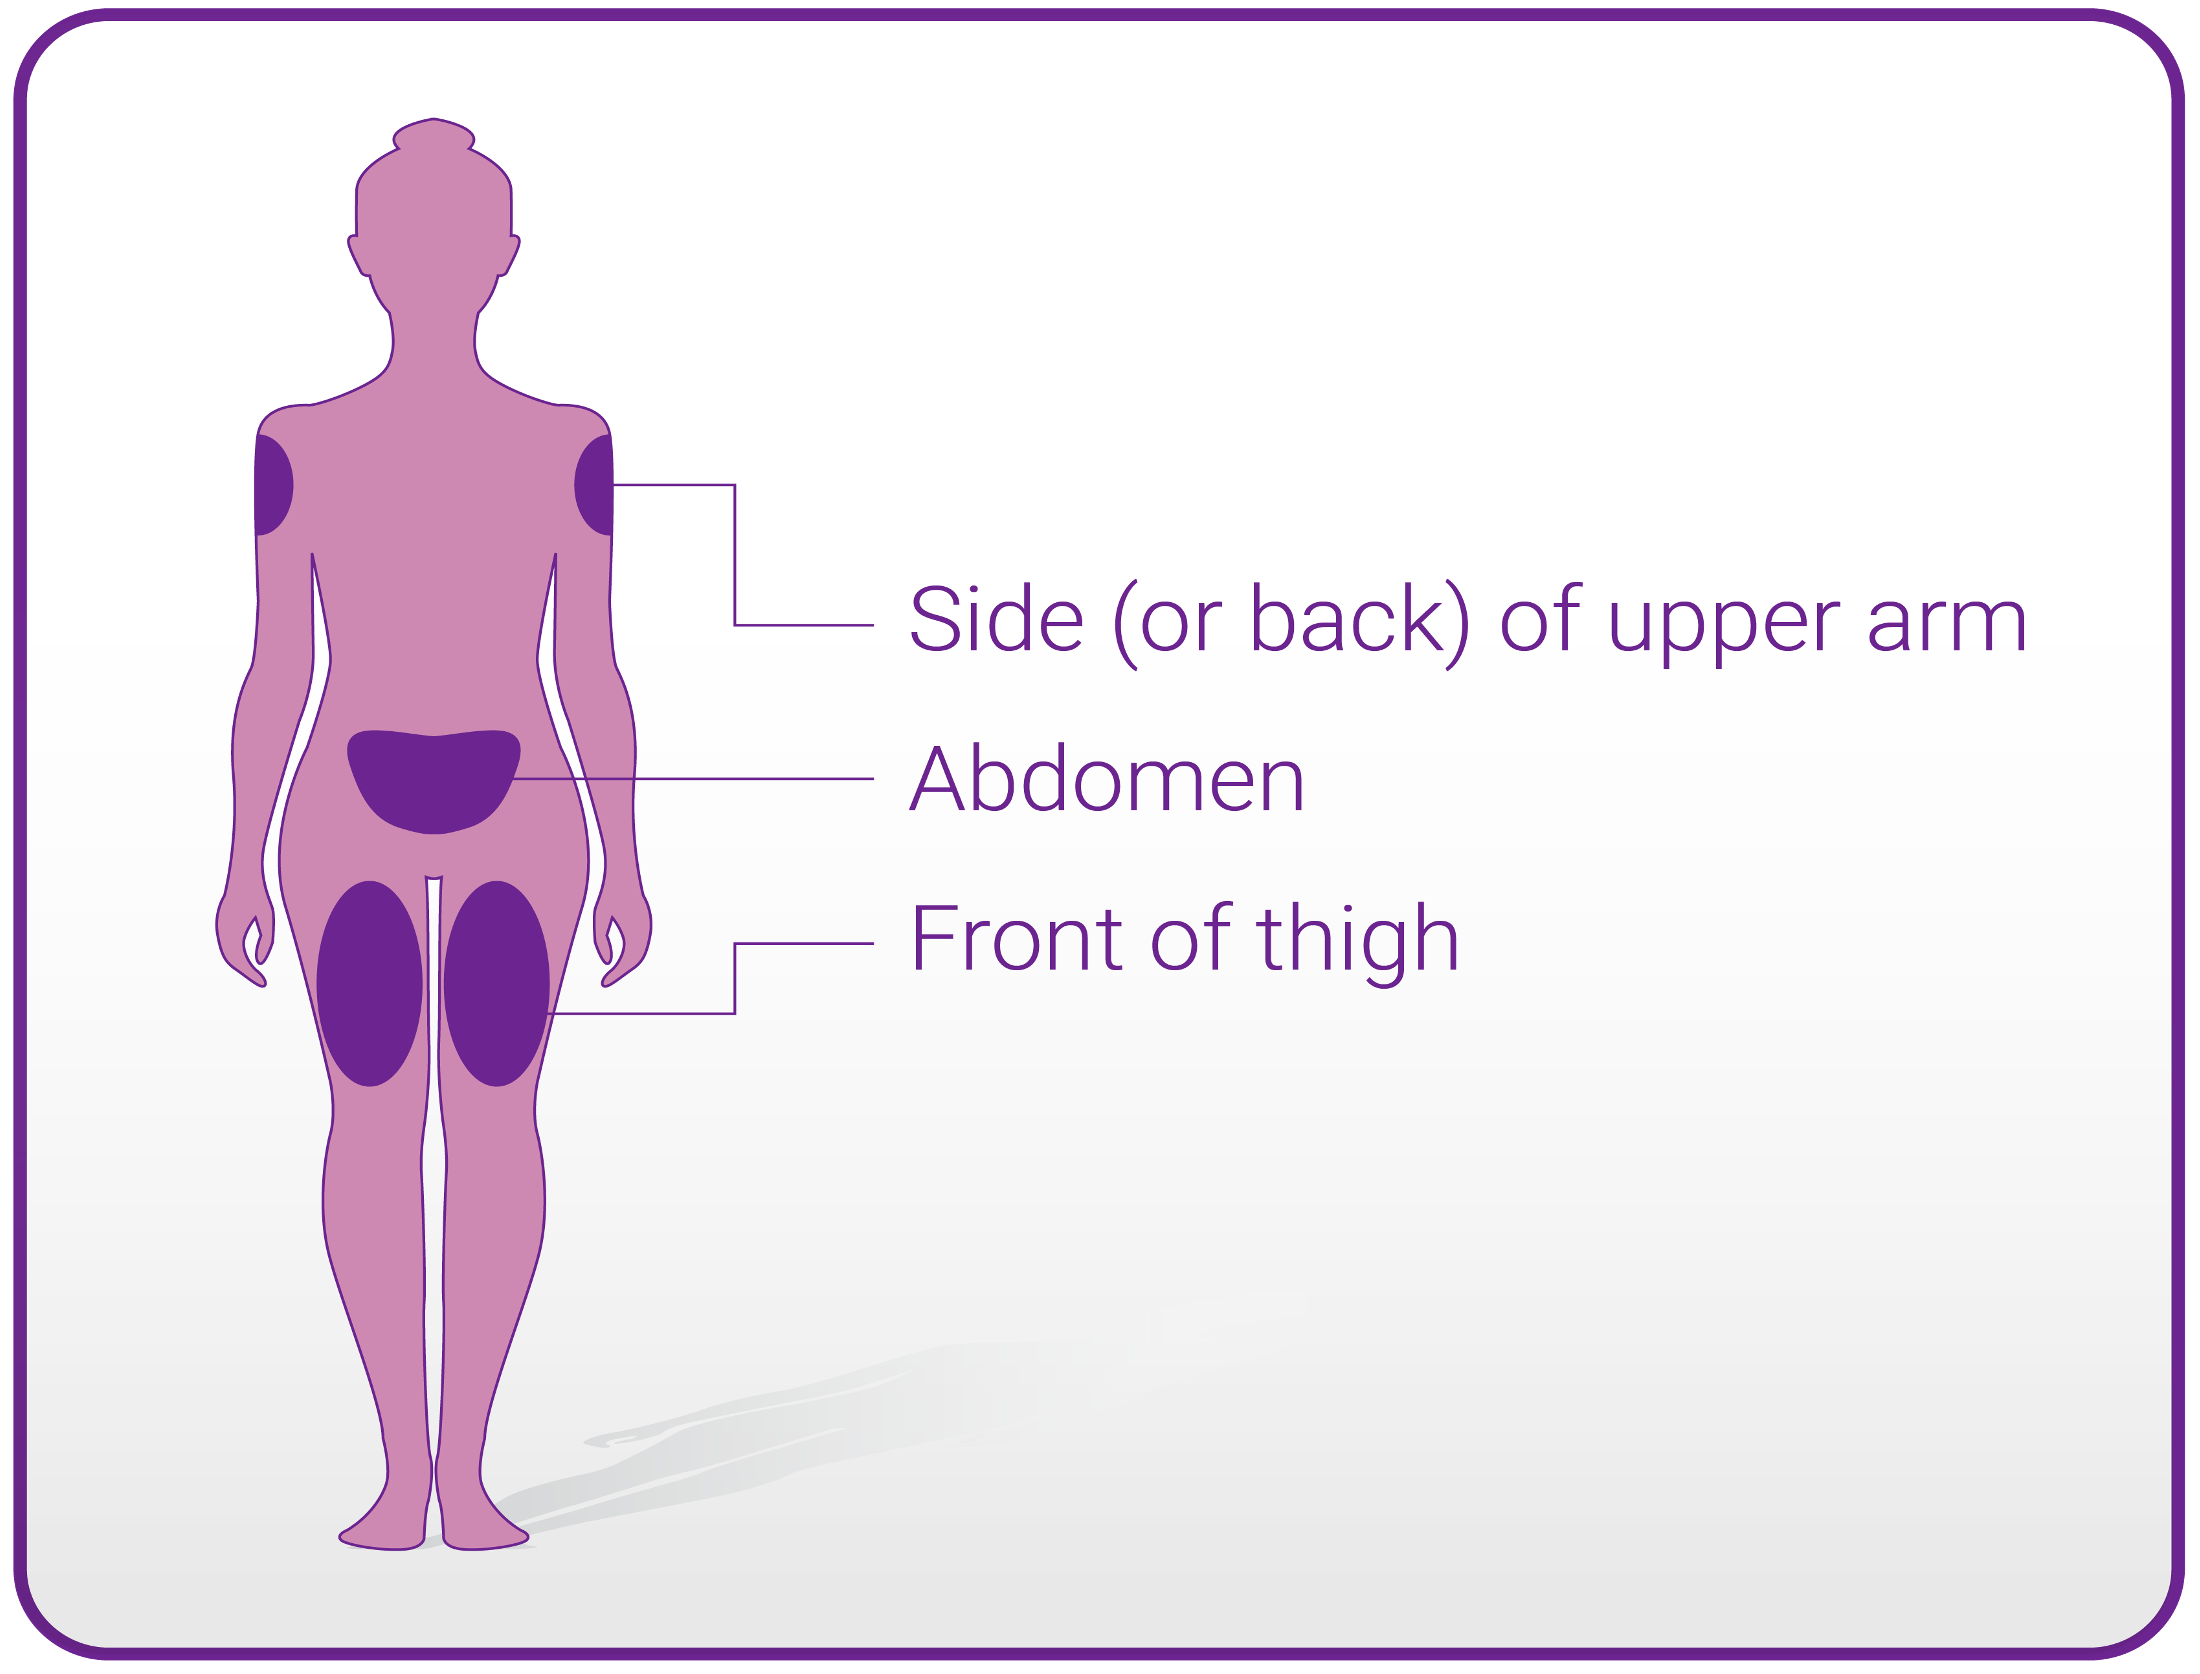
Injecting their dose. Insert the needle into their skin as their doctor or nurse has shown them. Make sure they can see the dose counter, trying not to cover it with their fingers as this might interrupt the injection.
Press and hold down the dose button until the dose counter shows 0. The 0 must line up with the dose pointer. They may then hear or feel a click.

Keep the needle in their skin after the dose counter has returned to 0 and count slowly to 6. If the needle is removed earlier, they may see a stream of solution coming from the needle tip. If so, the full dose will not be delivered. Hold the dose button down until the dose counter shows 0.
Remove the needle from their skin. They can then release the dose button. If blood appears at the injection site, they should press lightly. Do not rub the area. They may see a drop of solution at the needle tip after injecting. This is normal and does not affect their dose.
After their injection. Patients should lead the needle tip into the outer needle cap on a flat surface without touching the needle or the outer needle cap.
Once the needle is covered, carefully push the outer needle cap completely on. Unscrew the needle and dispose of it carefully.
Put the pen cap on their pen after each use to protect the solution from light. Always dispose the needle after each injection to prevent blocked needles. If the needle is blocked, they will not inject any medicine. When the pen is empty, throw it away without a needle on as instructed by their doctor, nurse, pharmacist or local authorities.
1.Nevolat® (liraglutide) Patient Information Leaflet. Available from: https://www.medicines.org.uk/emc/product/100226/pil .
000762555 | January 2026